Sync your Mindstamp Account to any External API
To get started with Connectors, first you must connect your Mindstamp account to the connection.
From Mindstamp, select the More drop down and select Integrations.
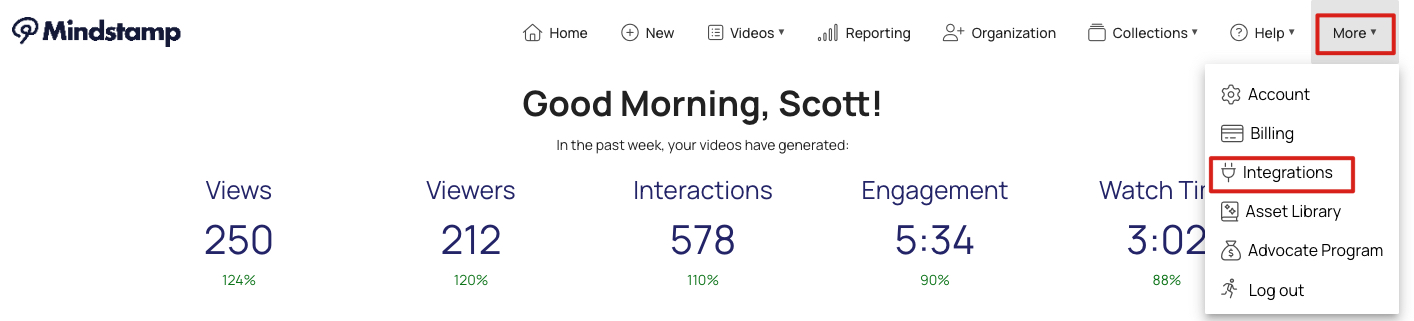
Navigate to Integrations
From the Integrations page, select Mindstamp and you will see the Connectors section.
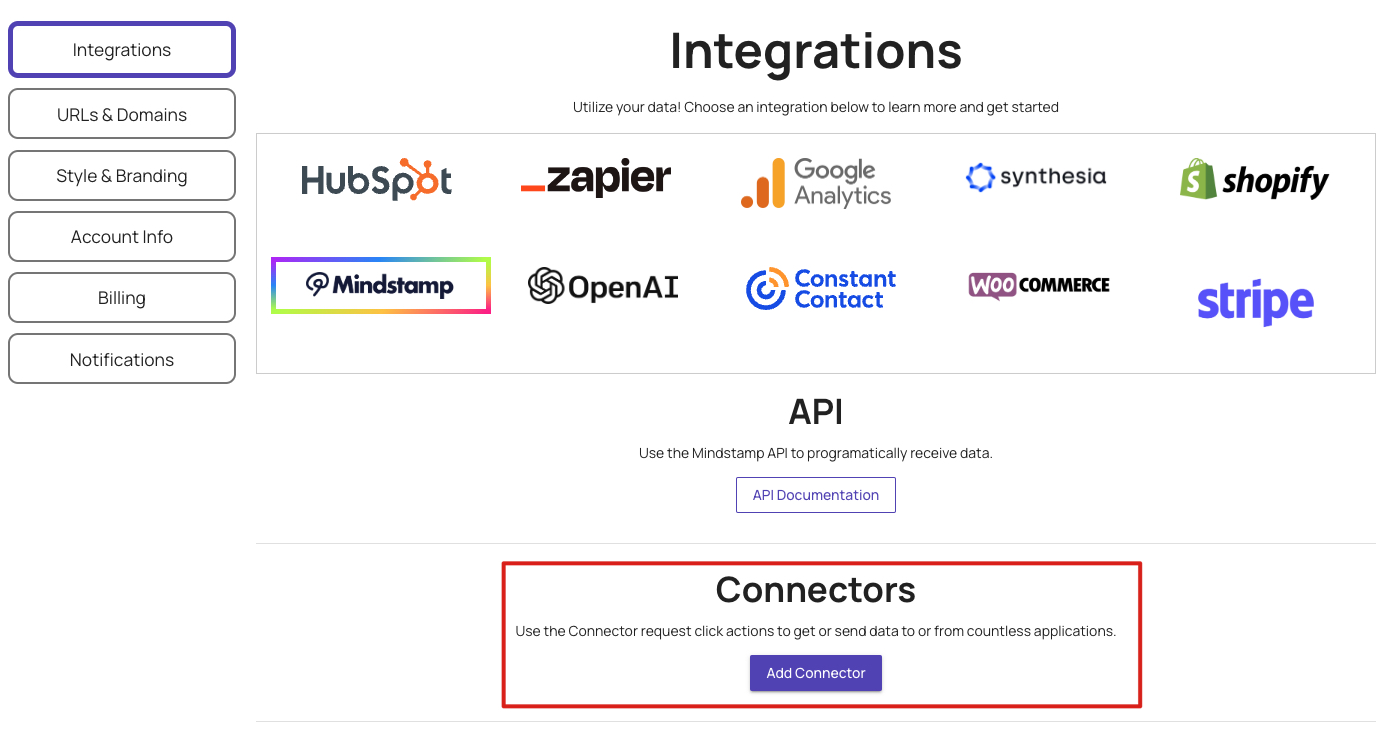
Integrations: Connector Section
From here you can add our first Connector by selecting Add Connector. When doing so you will see input fields for a new Connector.
Add New Connector
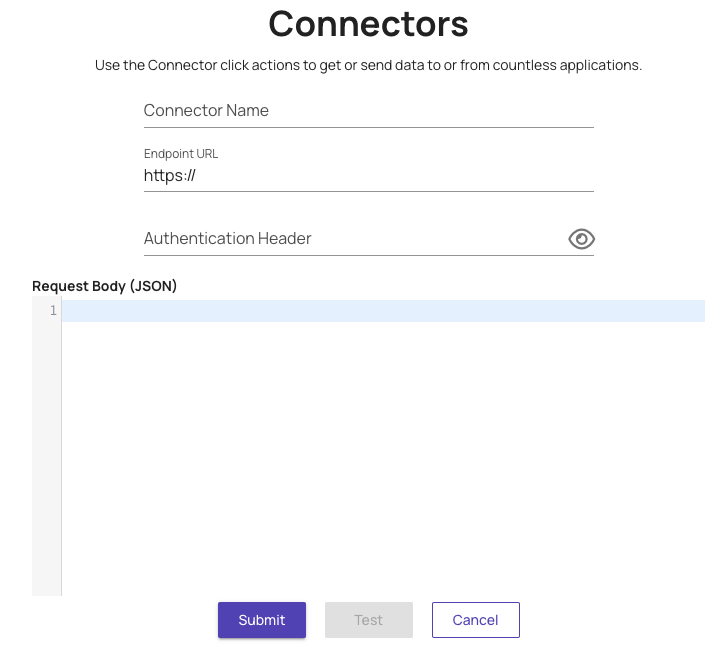
When creating a new Connector, the fields that you are to fill out are the Connector Name, Endpoint URL, Authentication Header, and the Request Body.
- Connector Name: The name that you want to give your Connector so you can identify later when using it in your videos.
- Endpoint URL: The URL in which you either want to get or send data. Typically this is found in the API documentation of the application in which you are creating a Connector.
- Authentication Header: The secret that you use to authentication yourself in the Connector application. Typically they will appear like
Authorization: Basic QWxhZGRpbjpvcGVuIHNlc2FtZQ==where 'Basic' might be 'Bearer' or not there at all. - Request Body: If the Connector requires a request body, you would put it here. The body needs to be formatted as a JSON Object. Below is a simple example of a JSON object. You will notice the entire object is surround with curly braces ({}) and each line is a key-value pair ending in a comma (except the last line). Each key and value should be enclosed in a double quote ("")
{
  "Name": "John Doe",
  "Email": "[email protected]",
  "Phone": "+13219876543"
}
Once all the fields are filled out, you can test your Connector by selecting Test or save your Connector by selecting Submit. Below is an example of a filled out Connector form using the Twilio API. This will serve to send SMS verification to the viewer of the video.

Filled out Connector
Note
In the above Connector, you will notice that I have used the {{phone}} variable in the Request Body. This is because when I'm using this in my videos. I will be capturing my viewers phone number, and then using it to send them an SMS. Since the phone will be dynamic according to my viewer, I need to use a variable here. You can learn more about variables here.
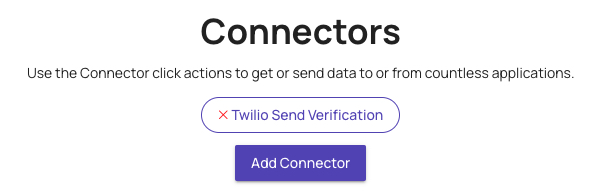
Once you Submit your Connector, you will see your new Connector on the Integrations Page. From there you can add another Connector if needed. You can remove a Connector by selecting the X next to the Connector. Deleting a Connector will not remove it from your existing videos but only from future usage.
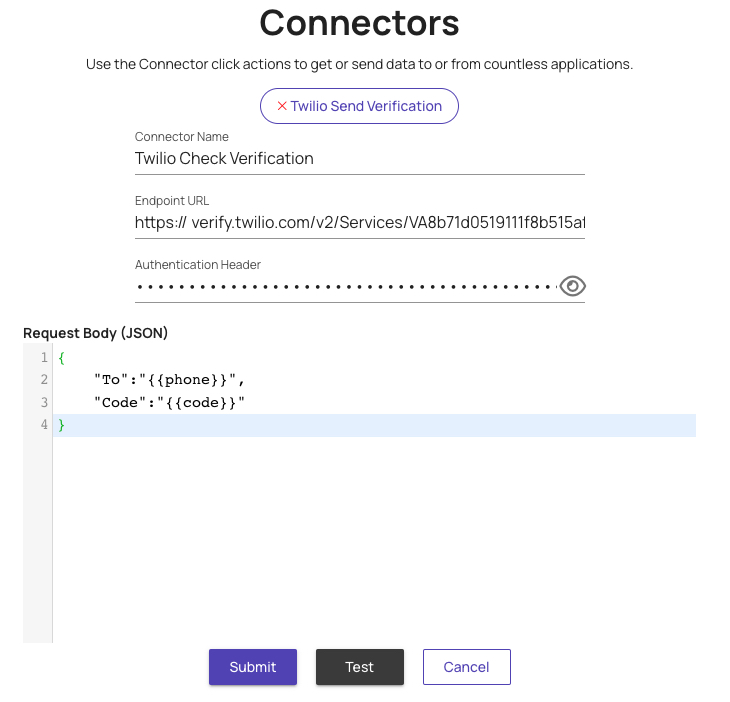
For this demonstration, I'm also going to create a Twilio Check Verification Connector that will be used to verify the user's verification number.
Get in Touch
Need help or want to know more about Connectors on Mindstamp? We're here for you! Contact [email protected] to use Connectors in your videos or to learn more about what's possible.