Summary
This step will walk you through how to install the Mindstamp package in your Salesforce environment and how to configure the Mindstamp Application in Salesforce.
Install the Mindstamp Managed Package (MS2SF)
Once you have logged into your Salesforce account as an Admin or user with appropriate
permissions, you will need to open one of the links to the Mindstamp Managed Package for Salesforce. The package can be installed in your sandbox or production environment.
Once authenticated, you will be presented with the screen to Install the Mindstamp package. Choose Install for All Users (under the assumption all Salesforce users should be able to see Mindstamp Views and Interactions) and click Install.
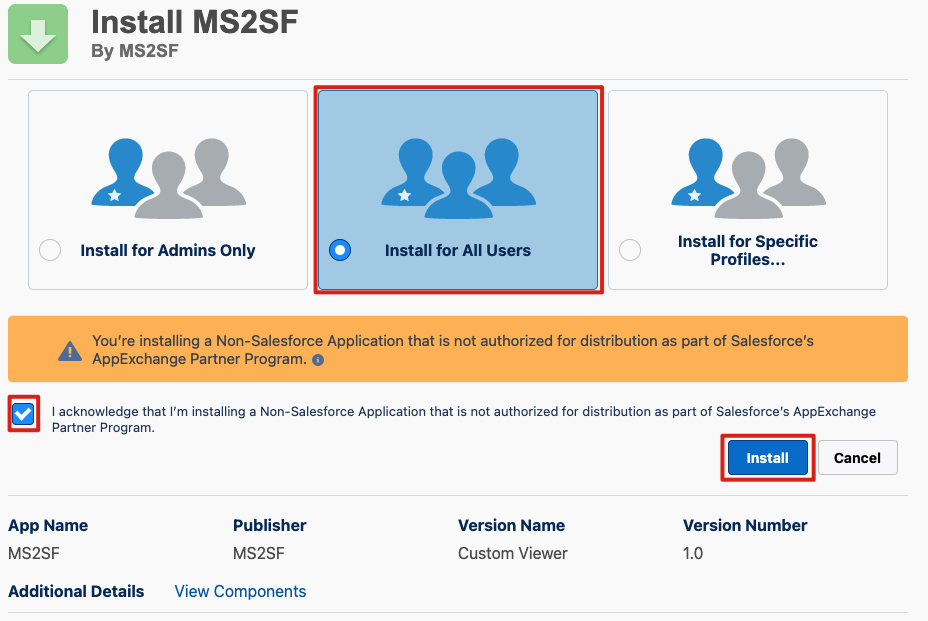
Mindstamp Managed Package Installation
Next, you will need to grant permissions to Managed Package to call Mindstamp APIs and receive data from the Mindstamp.
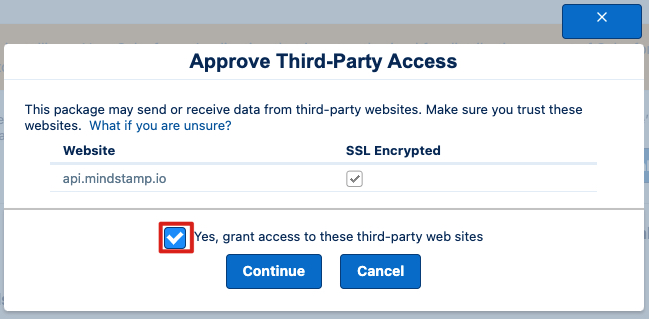
Approve API Access
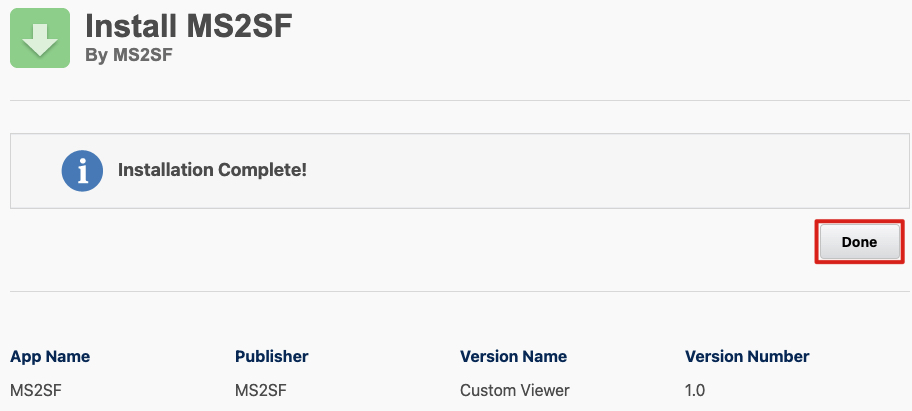
You will then receive an Installation Complete message and you can select 'Done' to continue.
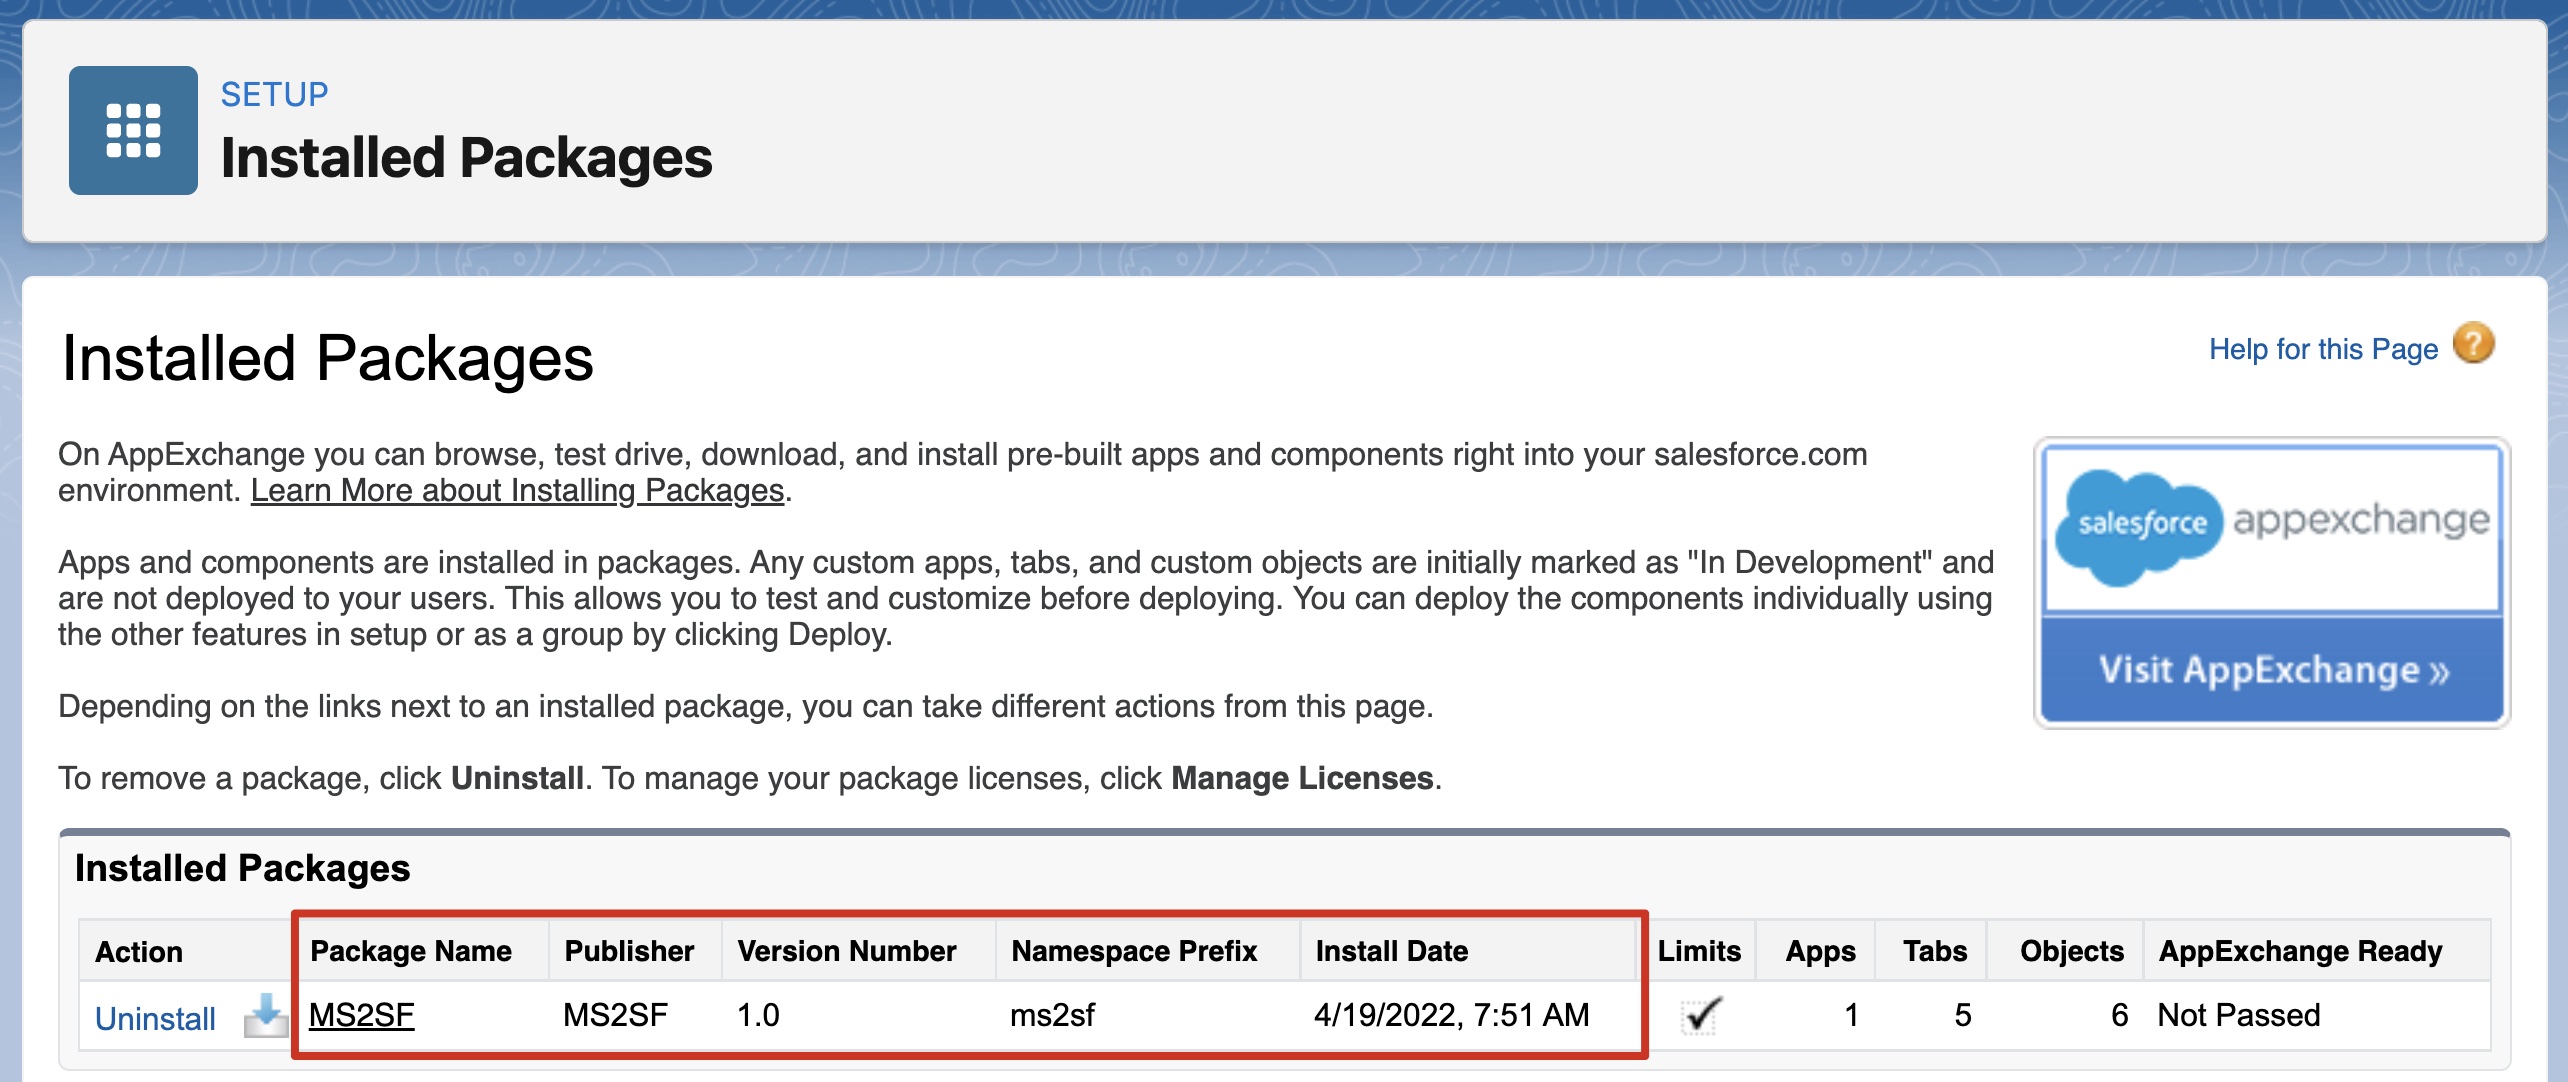
Once you select 'Done' you will be taken to the Installed packages page where you can verify a successful installation.
Configure the Mindstamp Application
Once the Mindstamp Managed Package is successfully installed, you must configure the Mindstamp application within Salesforce.
From your Salesforce homepage (you will be taken then once selecting 'Done' from above), select the '9 dot' menu and search for Mindstamp Configuration.
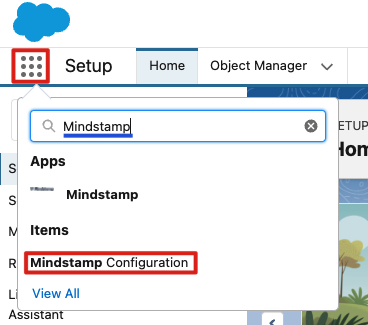
Mindstamp Configuration
After selecting Mindstamp Configuration, you will see the following screen where you will enter your configuration details.
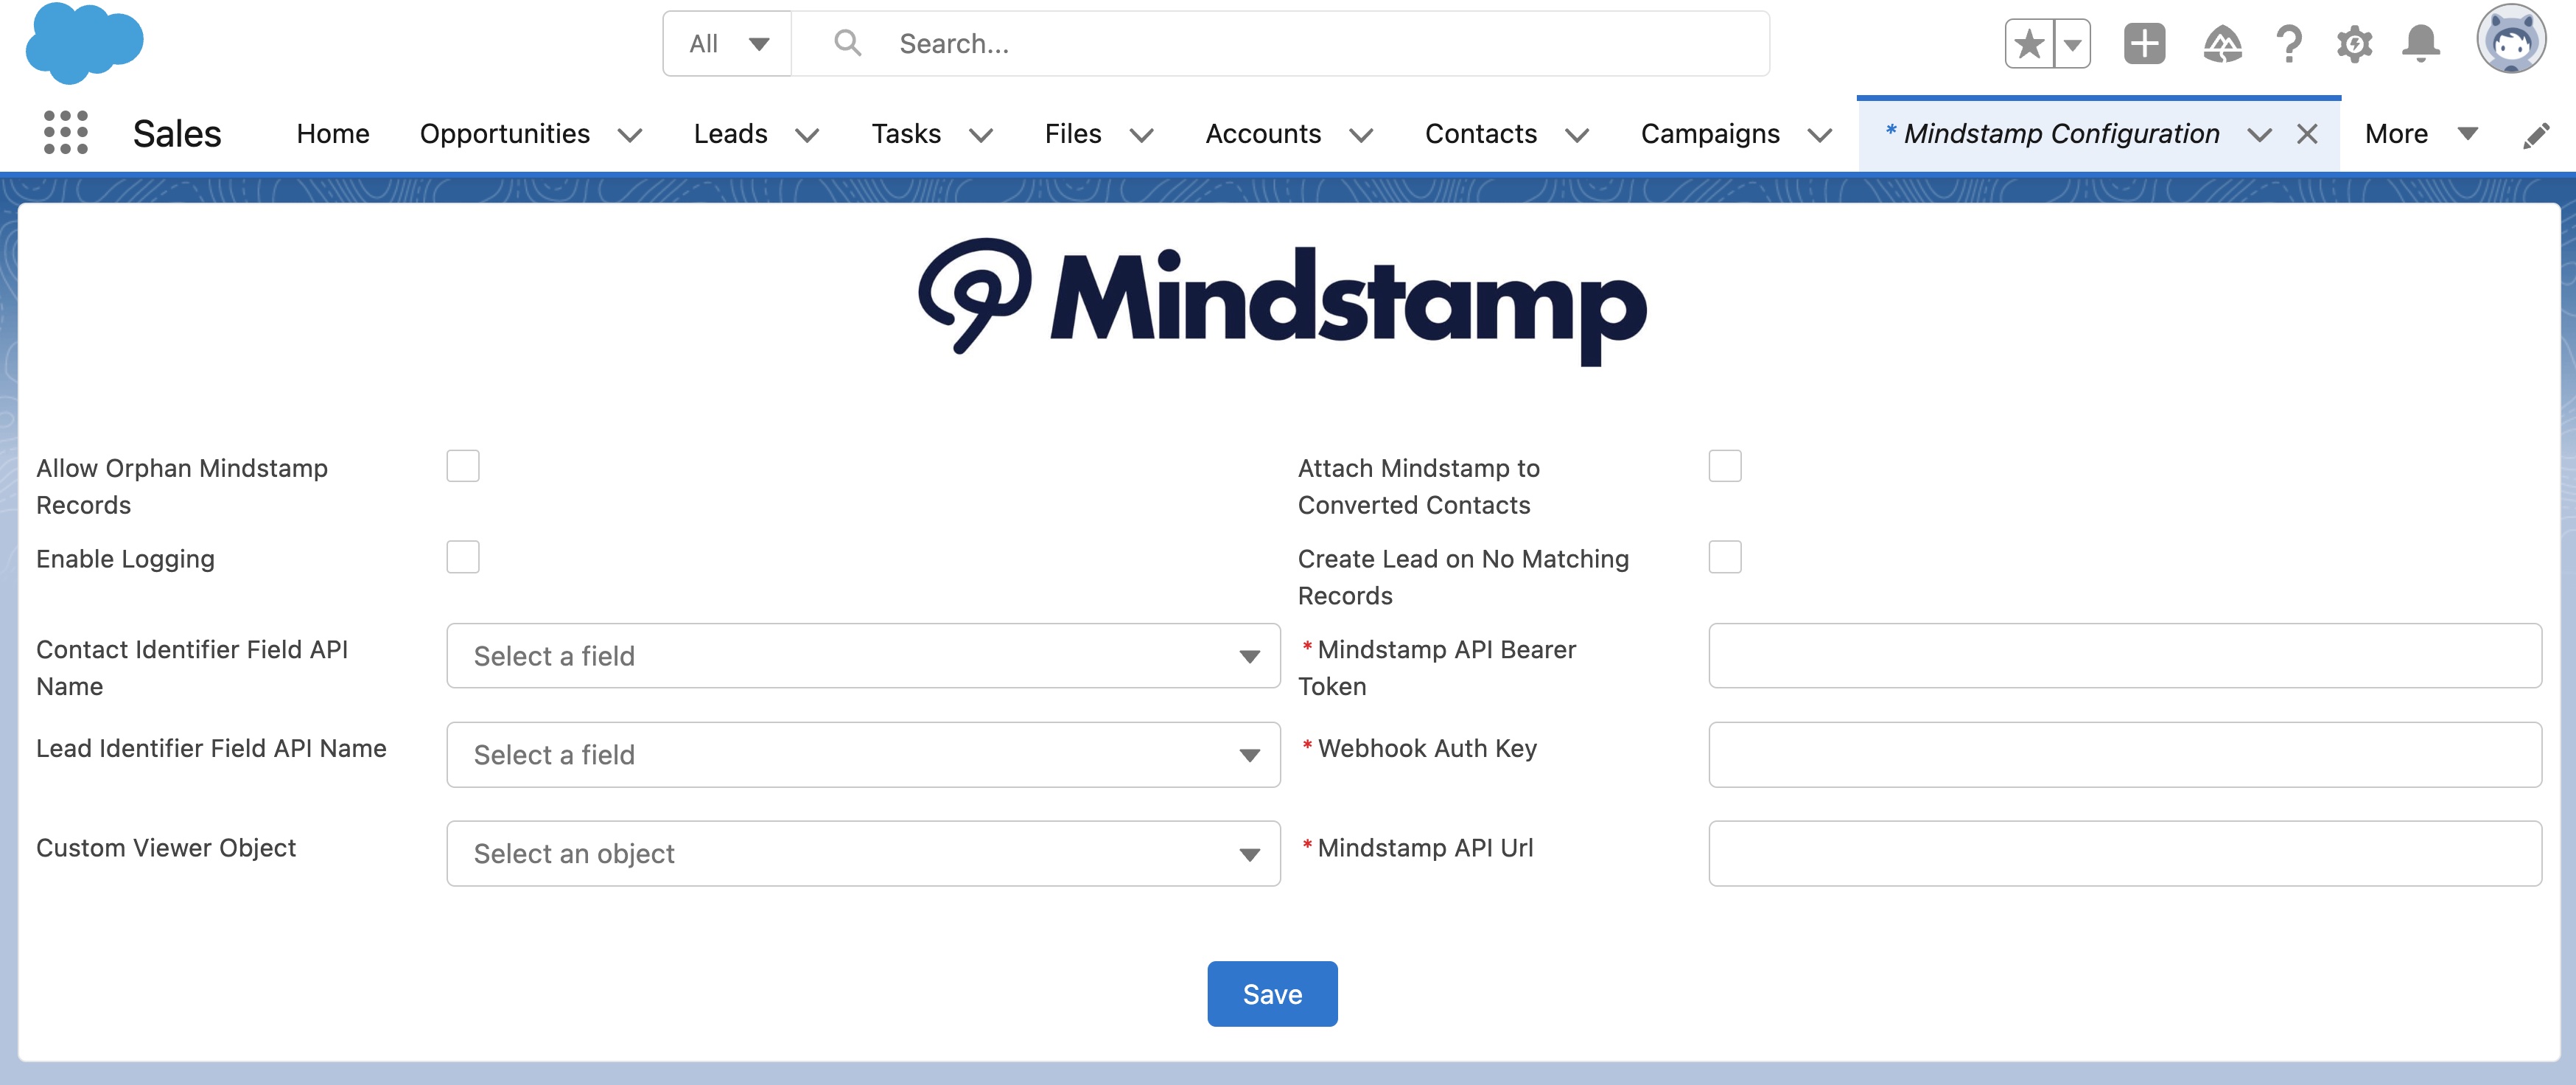
Mindstamp Configuration Details
From this page, you will need to enter the configuration information as follows.
| Configuration Element | Description |
|---|---|
| Allow Orphan Mindstamp Records | The Mindstamp <> Salesforce connection is specifically designed to map records to a Lead or Contact, or if that is not possible create a Lead. If you would like the Mindstamp <> Salesforce connection to create View and Interaction records even if they cannot be associated with a Lead/Contact or used to create a new Lead, click this option. |
| Enable Logging | This will provide you with additional information when Webhooks are received by Mindstamp. Check this box if you would like to recieve the logs. |
| Contact Identifier Field API Name | This is the field on the Contact object within Salesforce that the Mindstamp package will use to map ‘custom_ID’ from the Mindstamp View / Viewer record. Use 'id' If you do not have a specific ID you plan to send into Mindstamp. |
| Lead Identifier Field API Name | This is the field on the Lead object within Salesforce that the Mindstamp package will use to map ‘custom_ID’ from the Mindstamp View / Viewer record. Use 'id' If you do not have a specific ID you plan to send into Mindstamp. |
| Custom Viewer Object | If you are using a Custom Viewer Object for your configuration please view Step 1a: Custom Viewer Object. |
| Mindstamp API Url | Use: https://api.mindstamp.io/api/v1 |
| Attach Mindstamp to Converted Contacts | Check this box if you want Mindstamp Views and Interactions associated with a Lead to be associated with a newly created Contact as well. |
| Create Lead on No Matching Records | If a View is sent to Salesforce without a custom_id that can be matched to an existing Contact or Lead, this setting will instruct Mindstamp to create a Lead with the View information. At a minimum this requires a Name to be present in the Mindstamp data to succeed in creating a Lead. NOTE - Other required fields you have set on Leads may not be available via the Mindstamp View and may cause the Lead creation to fail. |
| Mindstamp API Bearer Token | This is the unique Bearer Token you will receive from Mindstamp upon upgrade to your Enterprise Subscription. |
| Webhook Auth Key | This is the unique key you will find in green text in Mindstamp under More > Account > Integrations directly underneath the title 'Webhook Key'. |
Once you have entered the values and configuration for your use case, click Save.
In the next step, we will create a configure a Salesforce Domain and Site to capture Mindstamp Webhooks.
Get in Touch
If you have additional questions regarding this setup, please contact us at [email protected].