Learn how to send events to HubSpot and test your configuration
Sending Events to HubSpot
In the previous section, we learned how to configure our Mindstamp videos to send event data to HubSpot. In this section we will review the view timeline, question response, and interaction click events. To send any (or all) of these events to HubSpot, ensure that you have them selected on the integrations tab of your video.
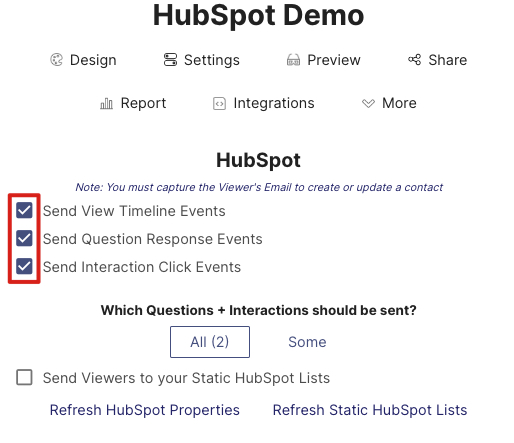
Mindstamp Event
When HubSpot events are enabled on your video, whenever someone views your interactive video, HubSpot will receive view timeline, question response, and/or interaction click events. But, in order for HubSpot to associate the events to a user, the viewers information needs to be captured (their email at a minimum). This can be done by passing an email as a parameter in the URL or through View Info Capture. To enable View Info Capture, click the Settings button on your video and place a check next to each field you would like the user to input.
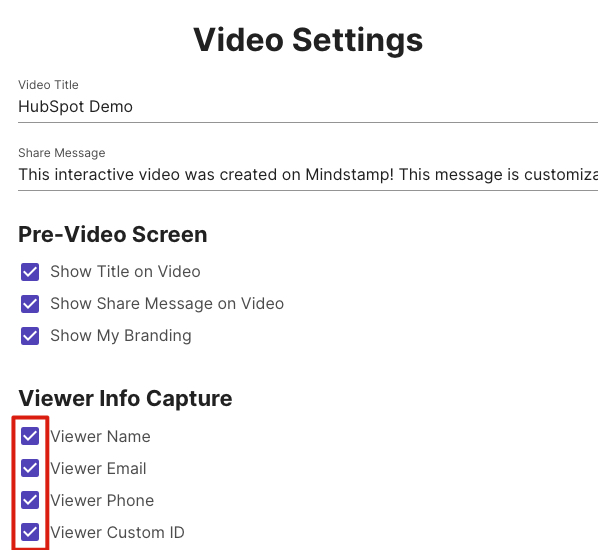
Viewer Info Capture
Reminder
At a minimum, the user email is required to create or associate a view to a contact in HubSpot.
That's all that is required to send these event types to HubSpot. Now let's test this to make sure it's working properly.
Testing Configuration
Once you have your video configured, we can now test the setup.
- Go ahead and add a question and a button to your video.
- Click on the Share button in your video and copy the share URL provided.
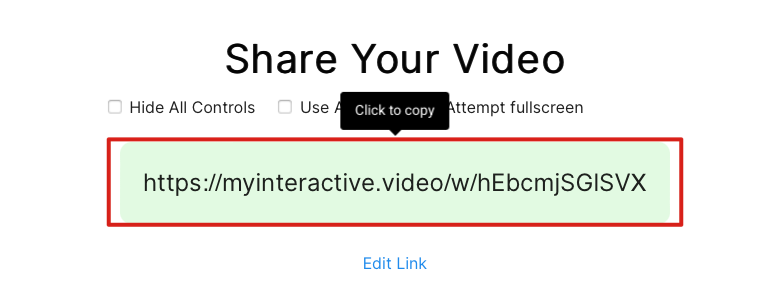
Copy Share Link
- Open a private browser window (File > New Private Window/Incognito Window)
- Paste the link in the private browser. Remember if you did not turn on Viewer Info Capture, you will need to add
[email protected]to the end of your url. - Once the video is up and running, go ahead and give this video a view, clicking on your test interactions and answering your example questions.
- Once the view has been completed, you can close out of the private browser window, and head over to HubSpot.
- You should see a newly created contact (or an updated contact based on the email you provided) for the view you tested in the previous steps.
- If you don't see anything, wait about 2 minutes for the contact to show in HubSpot.
In my example, I used an email of [email protected] and a name of Scott. As you can see below, these fields were used to create a new contact in HubSpot.

New Contact
So we can see that our new contact was created, let's checkout the other data that was sent from Mindstamp.
If you click on the user, you will be taken to their Activity page. From there, select Filer Activity.
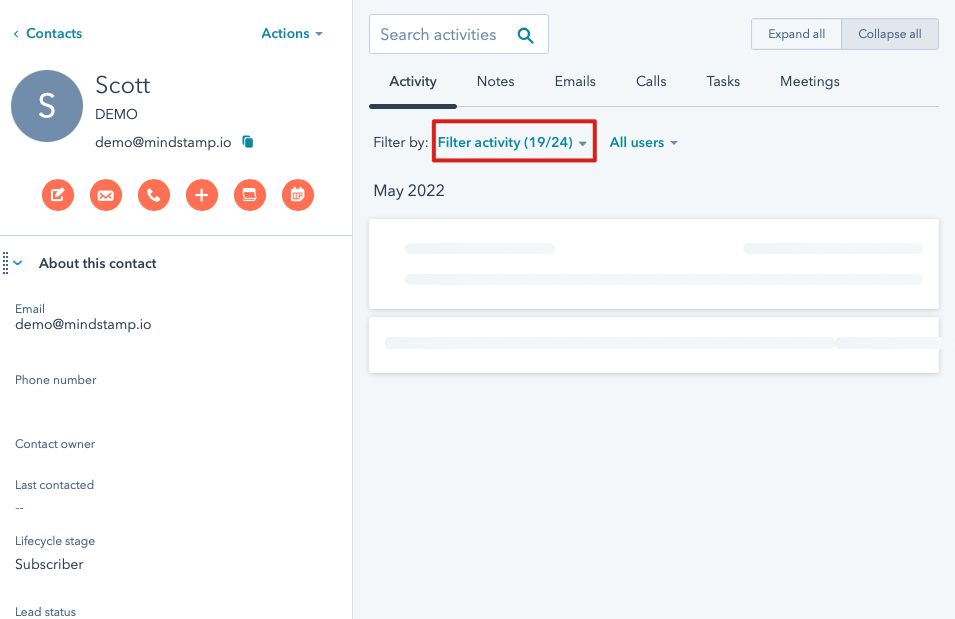
Filter Activity
From the dialog that shows, select Mindstamp under the Integrations section.
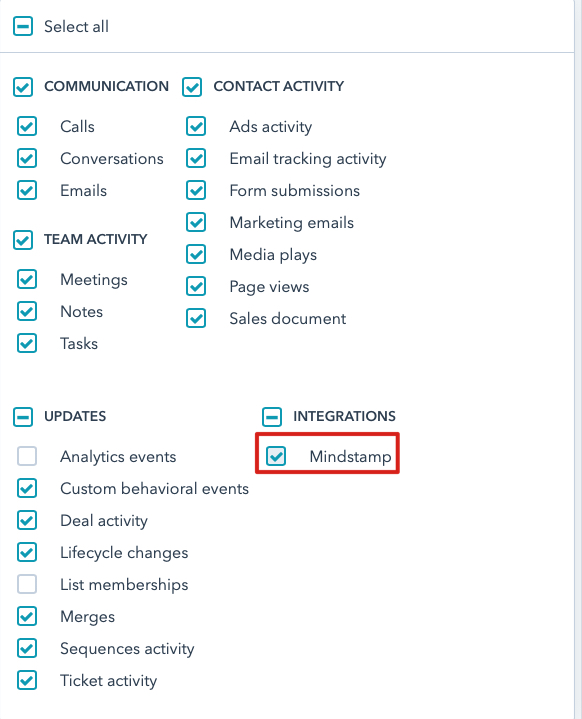
Mindstamp Integrations
Now, on the contact's page, I will be able to see view timeline, button clicks, and question response events.
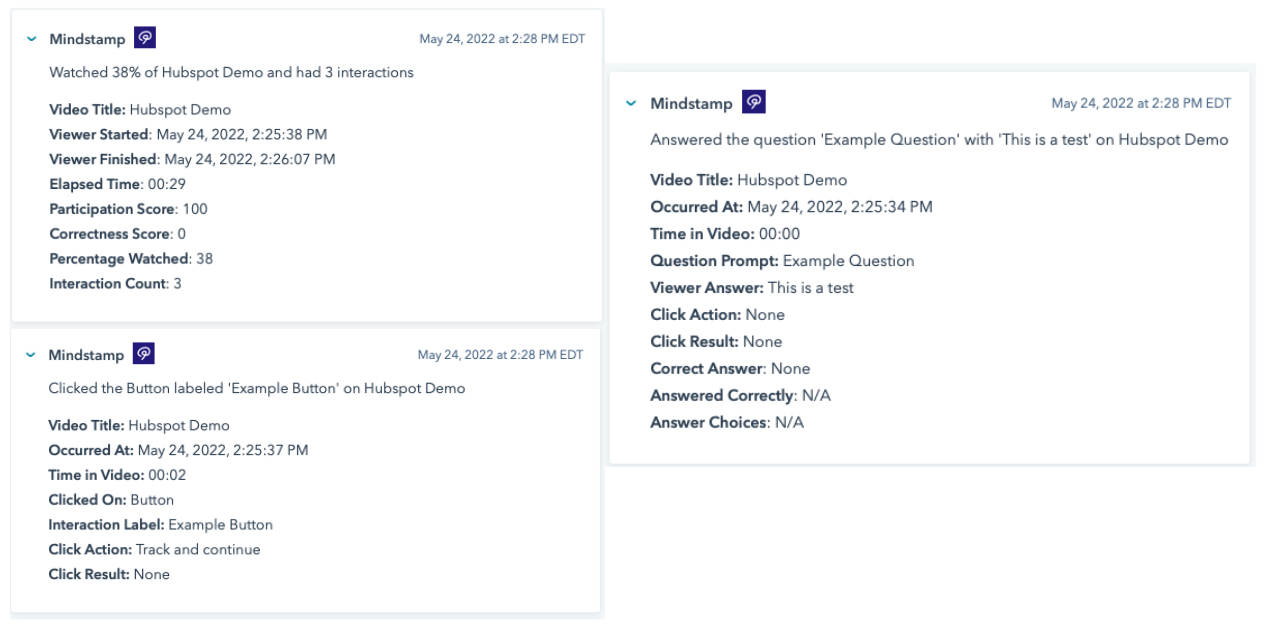
HubSpot Events from Mindstamp
Get in Touch
Need help or want to know more about using HubSpot with Mindstamp? We're here for you! Contact [email protected] to learn more.