Summary
This page servers as an alternative to capturing the Mindstamp webhook information as a Contact or a Lead but as a Custom Viewer Object.
Typically Custom Viewer Objects will be used if the current Salesforce Lead or Contanct do not suffice for the information that you are trying to capture. This is atypical, but incase needed, below are the steps to create a new custom object and how to link it to the Mindstamp Webhooks.
Create a Custom Viewer Object
Navigate to the Object Manager but clicking the gear in the top right of your Salesforce page and select 'Setup'.
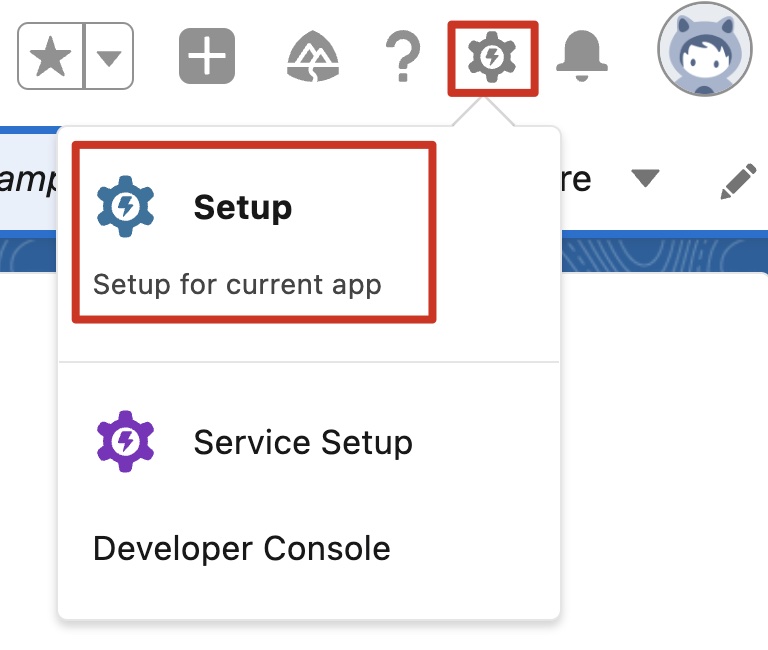
Setup
From the Setup page, select the Object Manager and hover over the Create drop down and select 'Custom Object'.
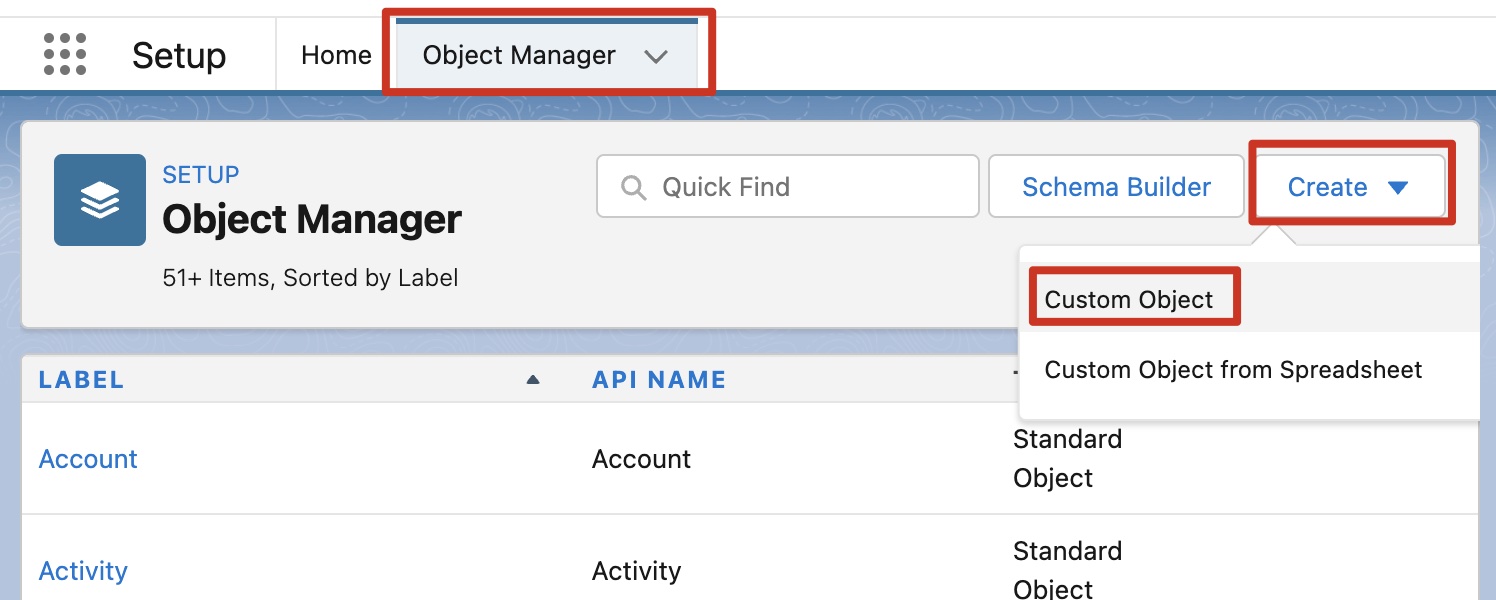
Create a Custom Object
From the New Custom Object page, enter a label and plural label. These can be anything that you want, for this example, we will use 'Client Viewer'.
At the bottom of the page, select a check next to 'Launch New Custom Tab Wizard after saving this custom object'.
Press 'Save' once complete.
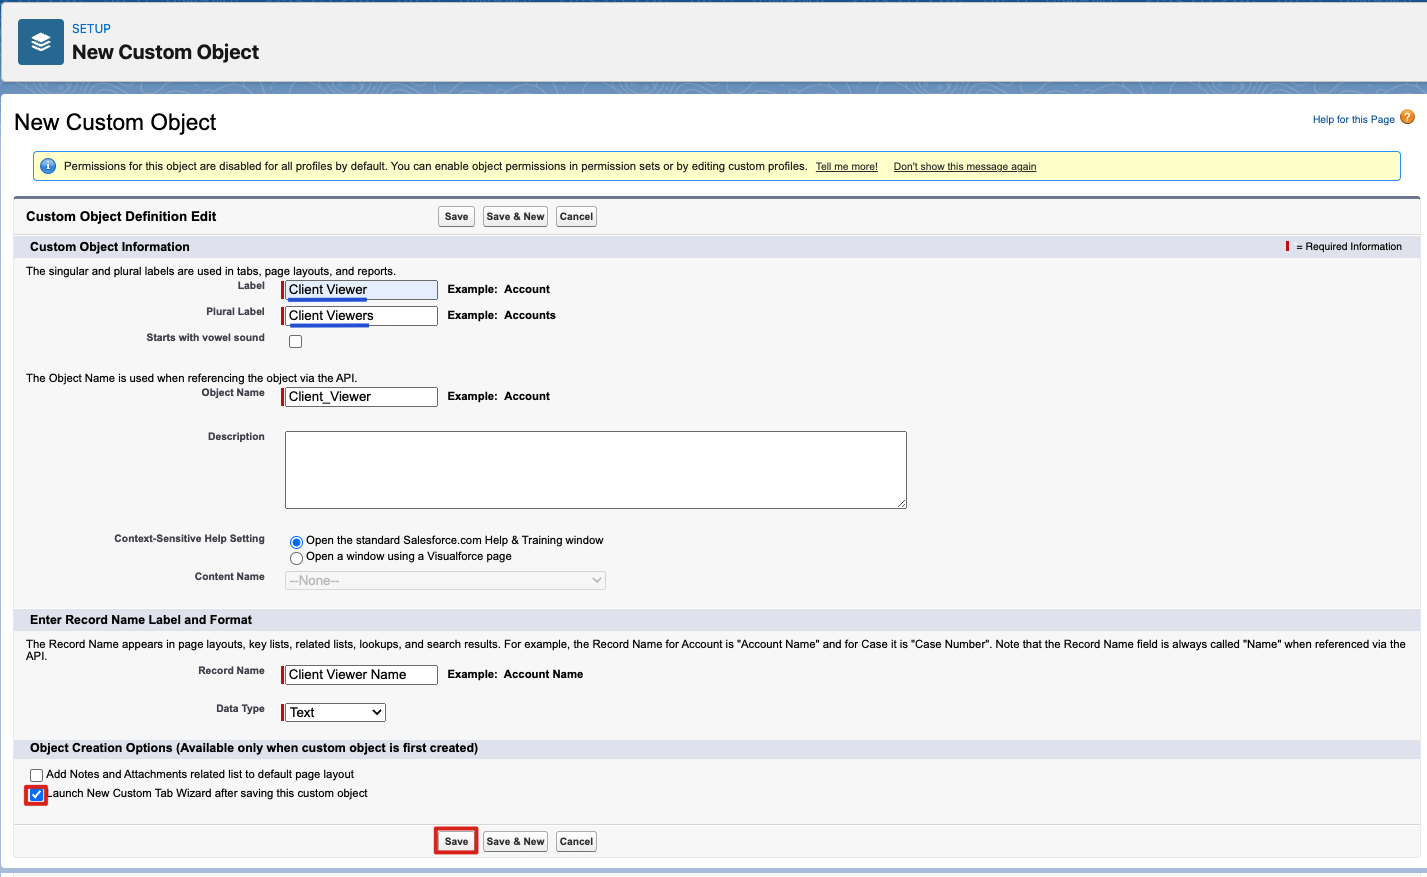
Create Custom Object
After you hit save, you will be taken to a tab to create a tab. This will allow for easier access to your custom object from your Sales page.
NOTE: If you skip this step, you will not be able to create the tab later.
On step 1, select any tab style you wish and you can next through the remaining steps leaving the default options as is. Hit 'Save' at the end of step 3.
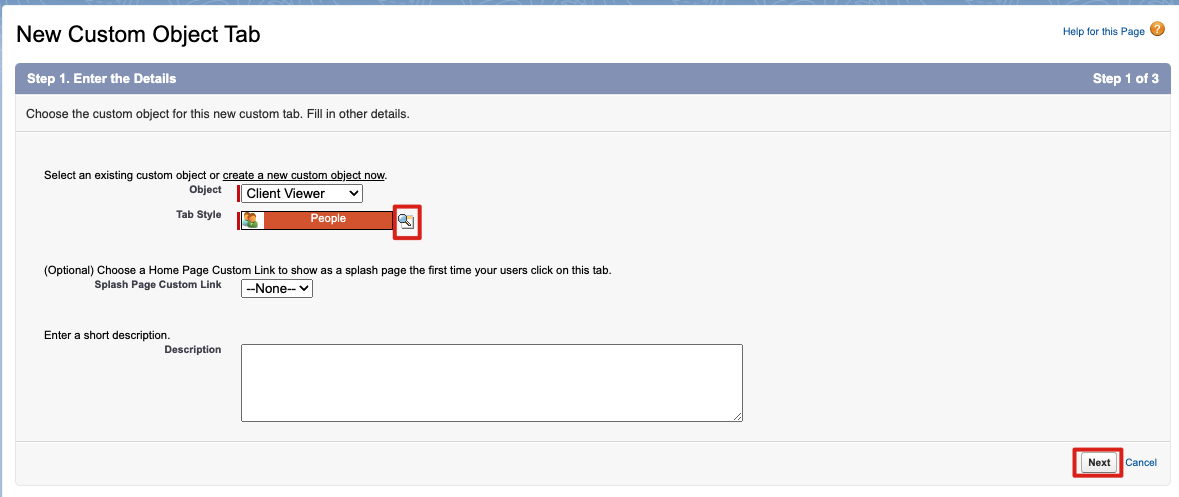
Custom Object Tab
Once our Custom Object has been created, we need to create a relationship between the Mindstamp ID from the webhooks to the Client Viewer Object ID.
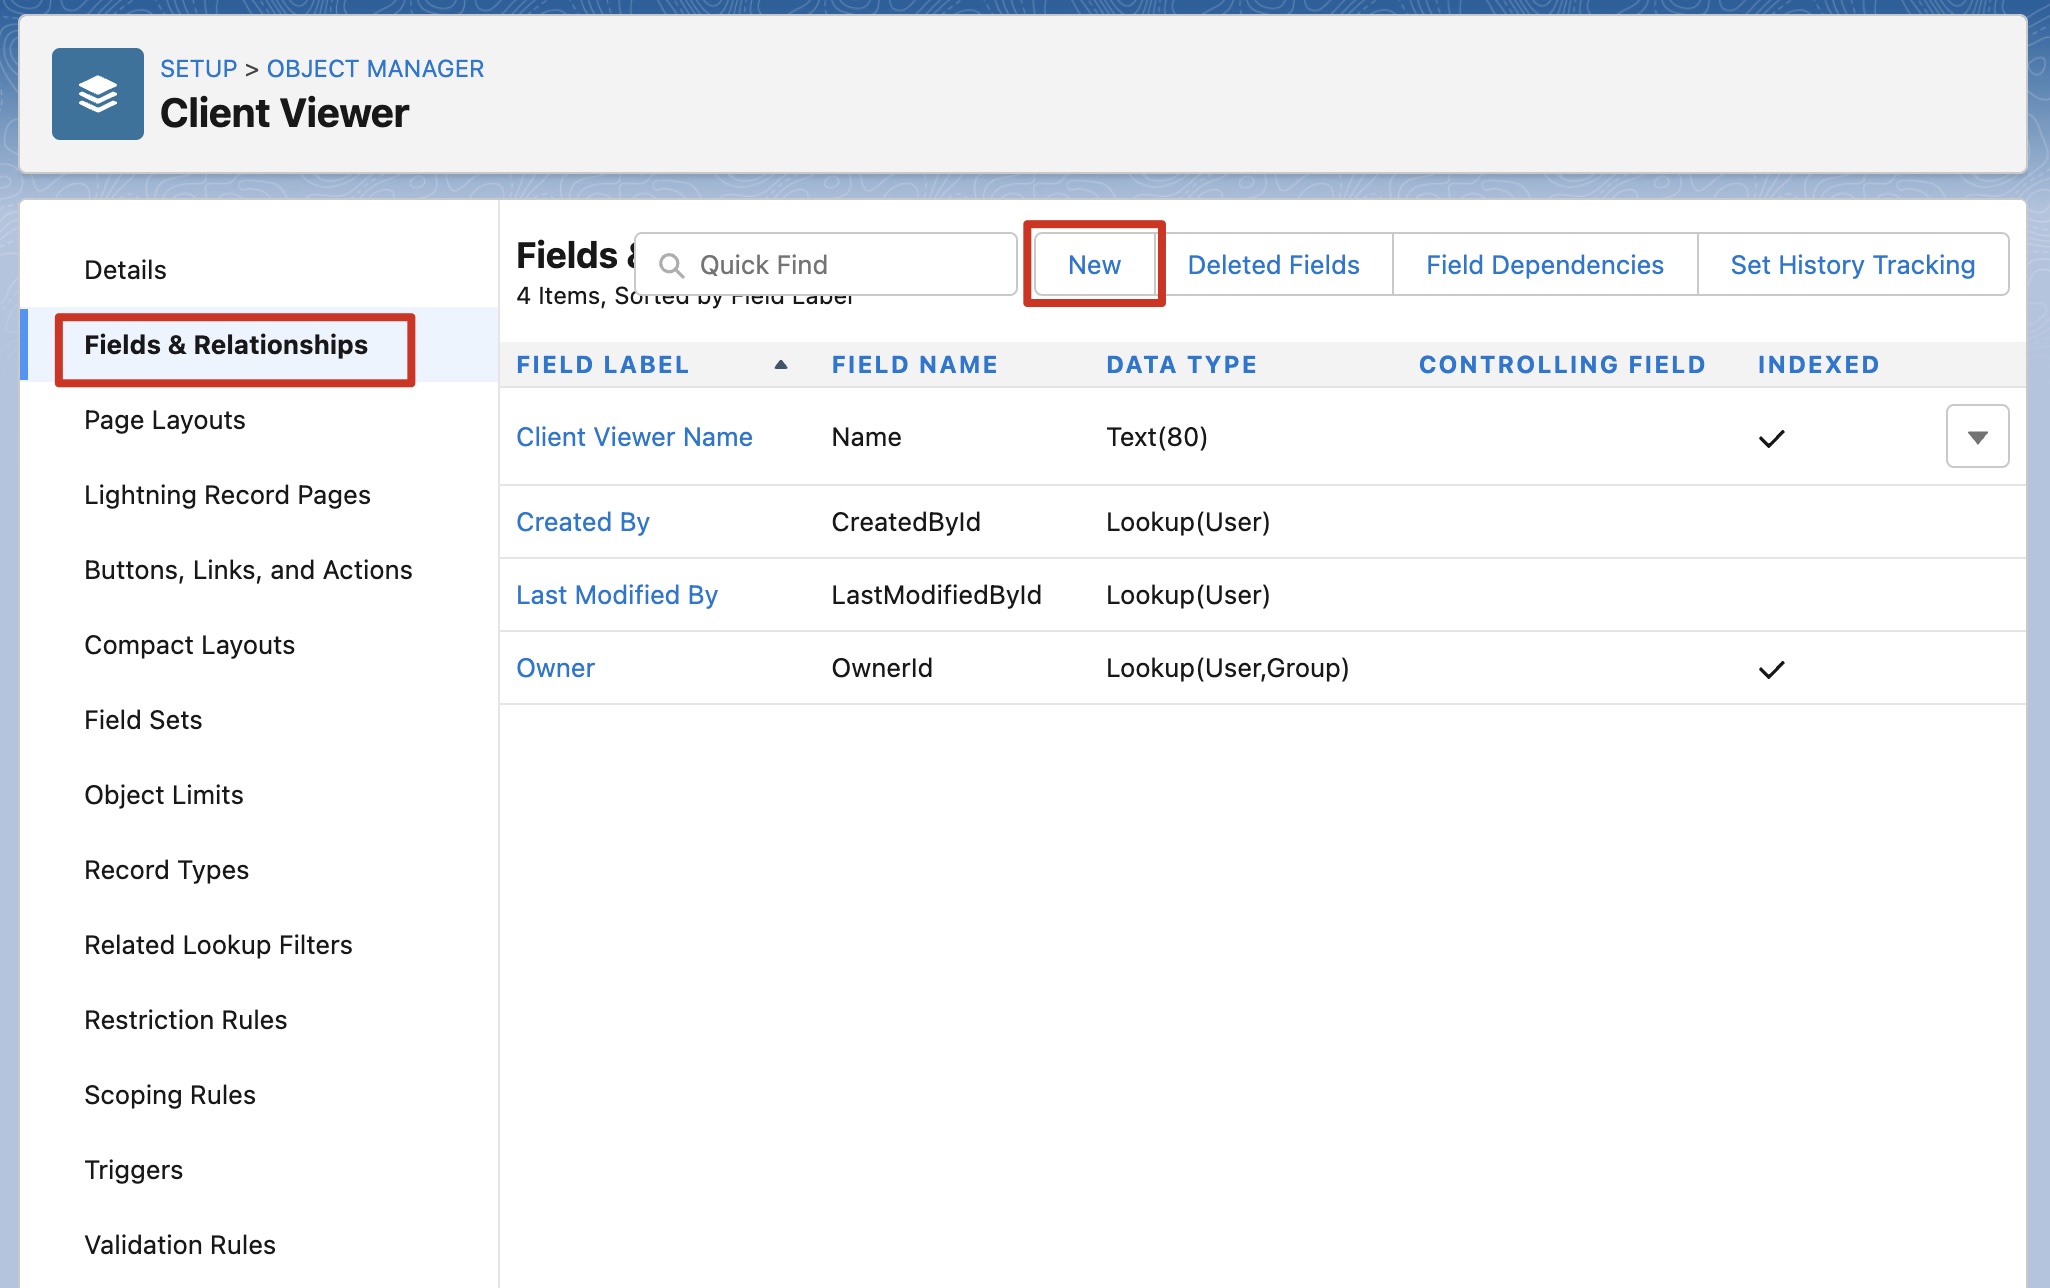
Create Relationship
On step 1 of the New Custom Field, select 'Text' then 'Next'.
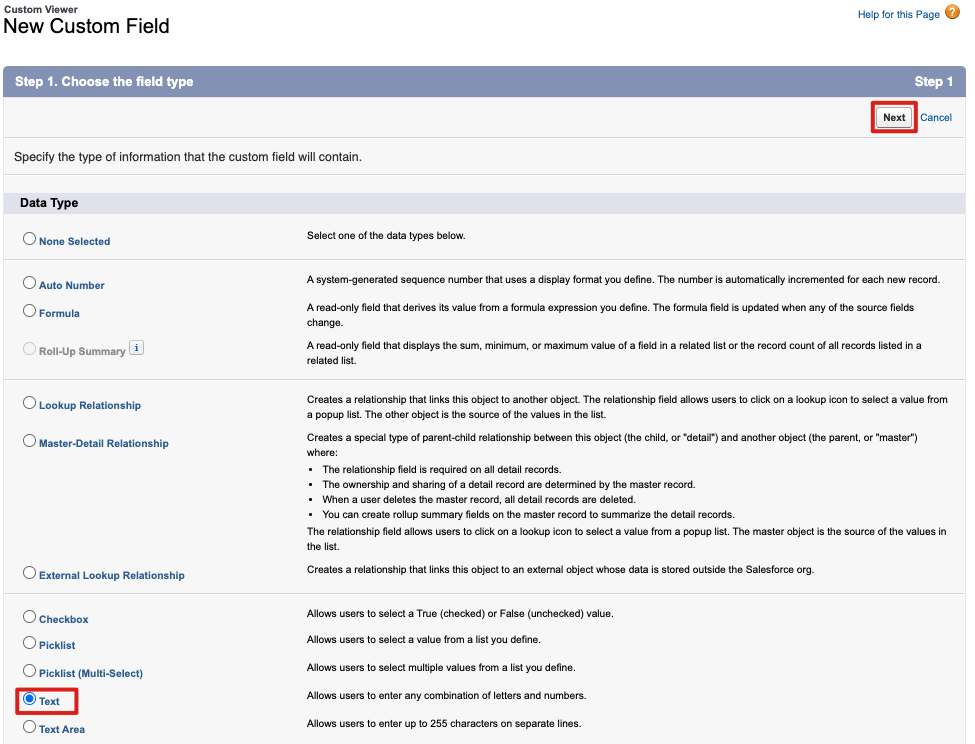
Text Field
On Step 2, enter the Field Label (the Field Name will autopopulate) and the Length of 255.
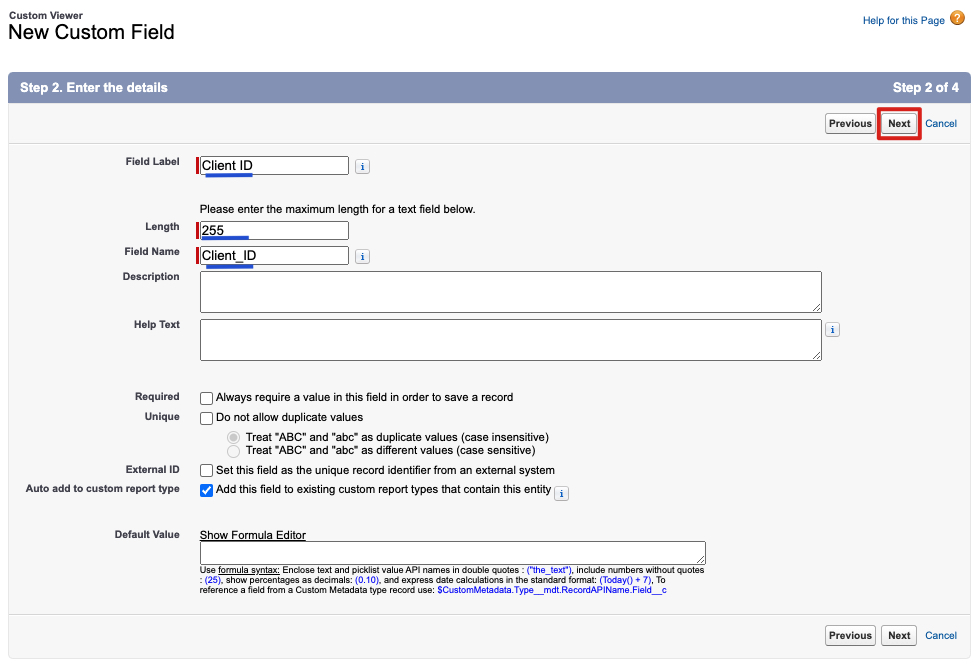
Input Field Name
On Step 3, select next without making any changes.
On Step 4, select save without making any changes.
You should now see the new Client ID field.

Fields & Relationships
Map the Customer Viewer Object to the Mindstamp View and Interaction Objects
Next, we need to map the Salesforce View and Interaction object from the Mindstamp package to our custom object.
Going back to the Object Manager, input 'View' into the search box and select the 'View' label with ms2sf__View__c as the API name.

Find View Object
From the View object page, select 'Fields & Relationships' and select 'New'.

Create New Field
Since we are mapping the Custome Viewer Object (Client Viewer) to the Mindstamp Viewer, we will need to do a lookup relationship in step 1.
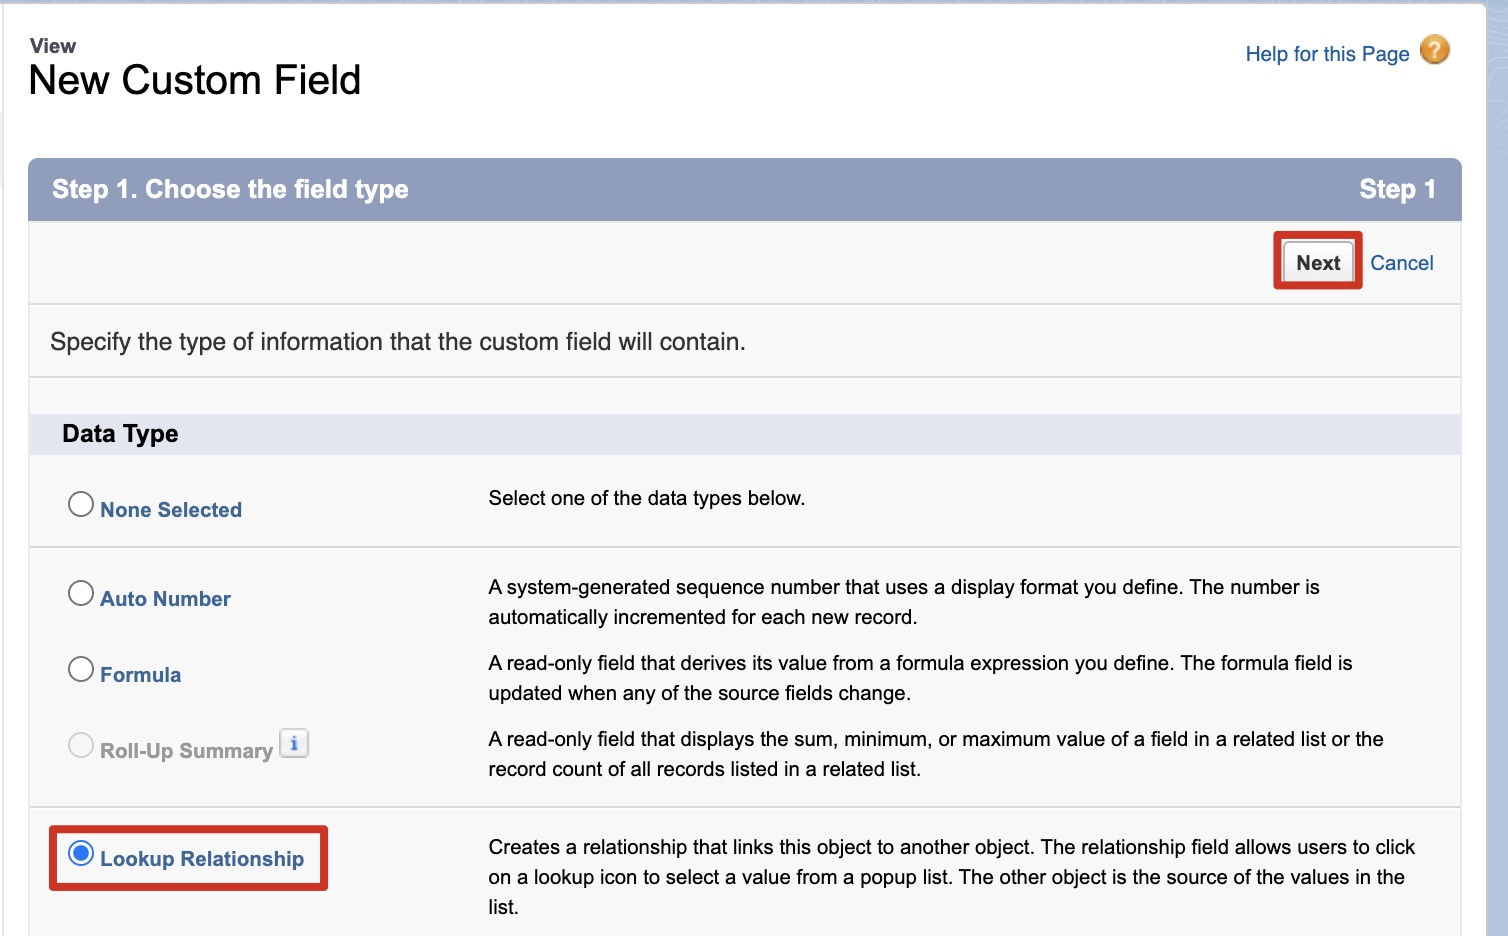
Lookup Relationship
For step 2, select Client Viewer in the Related To drop down.
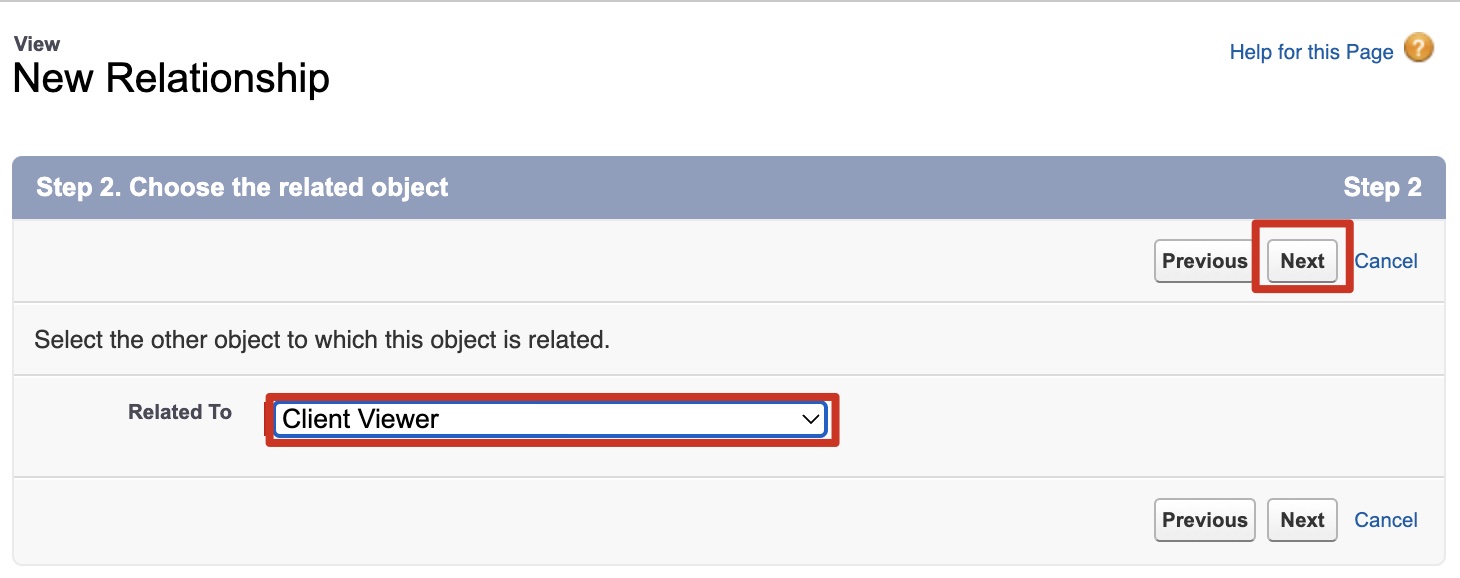
Related To Dropdown
For steps 3-6, leave everything as default and click save.
Repeat this section for the Interaction object instead of View.
Configure
We can now go back to the Mindstamp Configuration page and fill out the following fields:
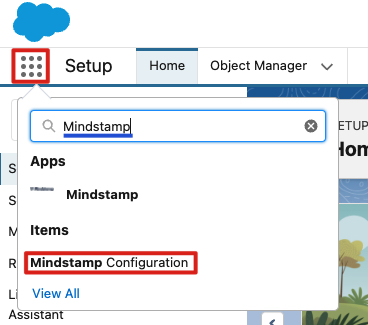
Mindstamp Configuration
| Field | Value |
|---|---|
| Contact Identifier Field API Name | none |
| Lead Identifier Field API Name | none |
| Custom Viewer Object | client_viewer__c |
| Custom Viewer Identifier Field API Name | client_id__c |
| Custom Viewer Reference on View | client_viewer__c |
| Custom Vieer Reference on Interaction | client_viewer__c |
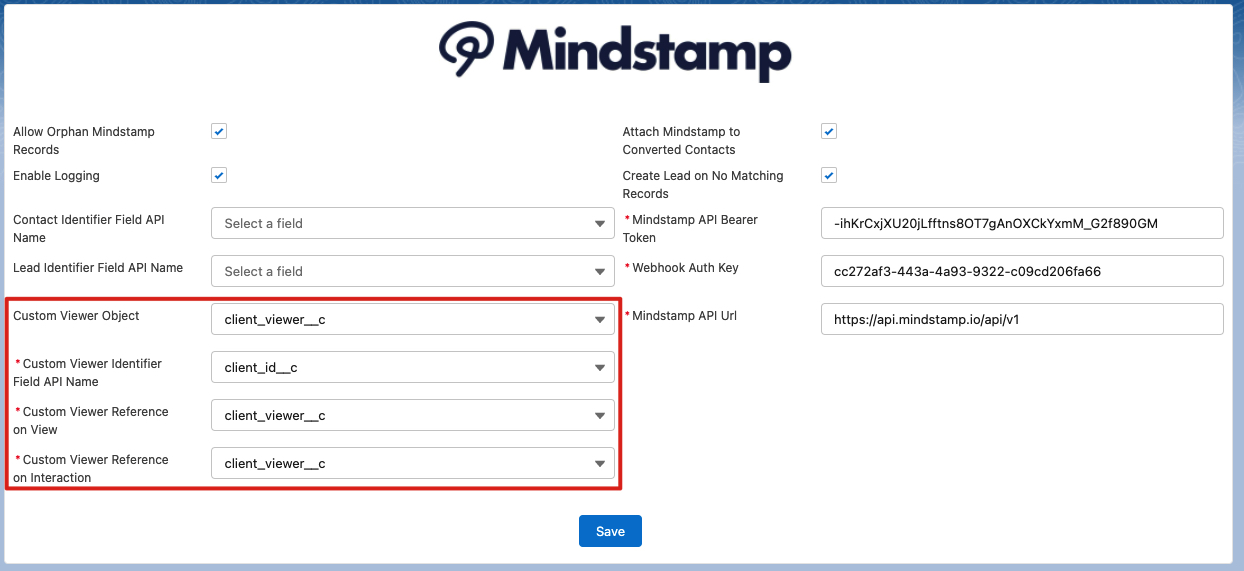
Mindstamp Configuration with Custom Object
Get in Touch
If you have additional questions regarding this setup, please contact us at [email protected].