This page will take you through the setup of Zapier with your Mindstamp account
Getting Started
The Mindstamp <> Zapier package is publicly available and can be used by any Core, Pro, and Enterprise Mindstamp. Follow the below steps to create your first Zap to get started!
Create a Zap
From the Zapier homepage, we're going to start by creating a Zap! You can select "Create a new Zap."
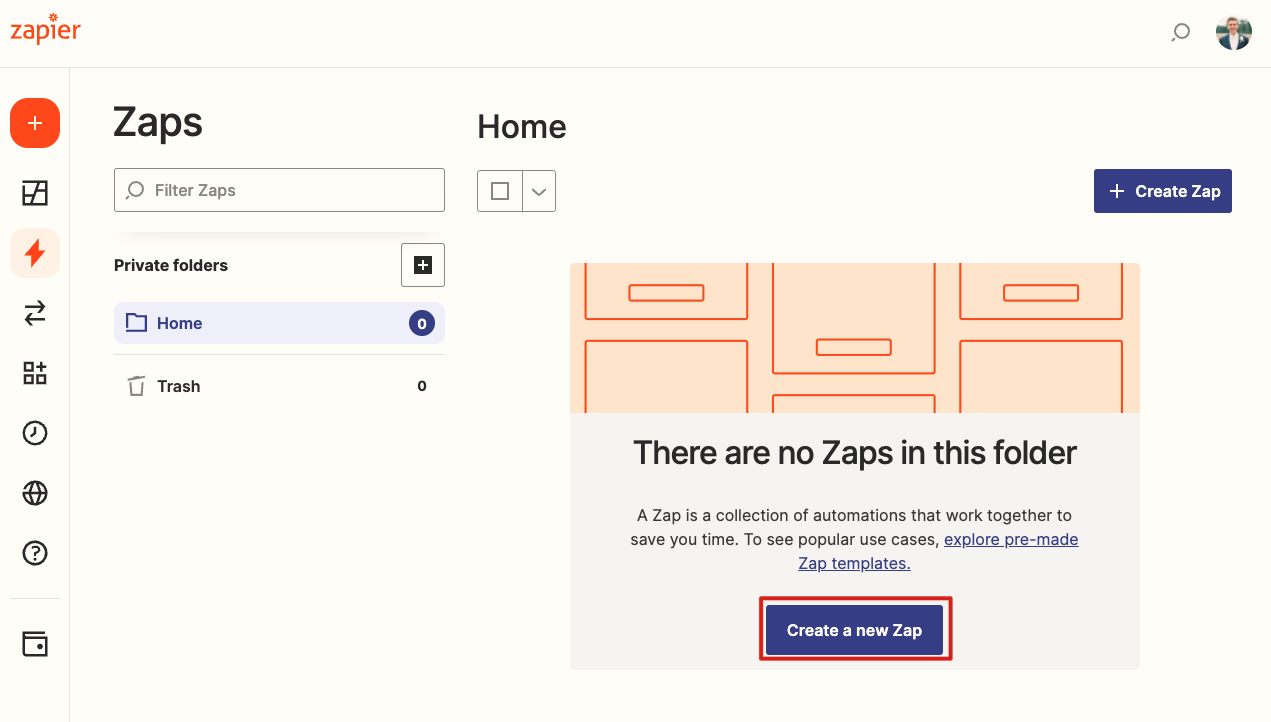
Create a new Zap
Name your Zap
Once you are on the Zap creation page, we will name our new Zap. You can name it whatever you like, so for this walkthrough, I will use "Mindstamp Demo!"

Name your Zap
1. Set up a Trigger
Once you have named your Zap, you can setup a the trigger. The trigger will be the event that starts your zap. In the search bar, input 'mindstamp' and then select the Mindstamp application that is shown.
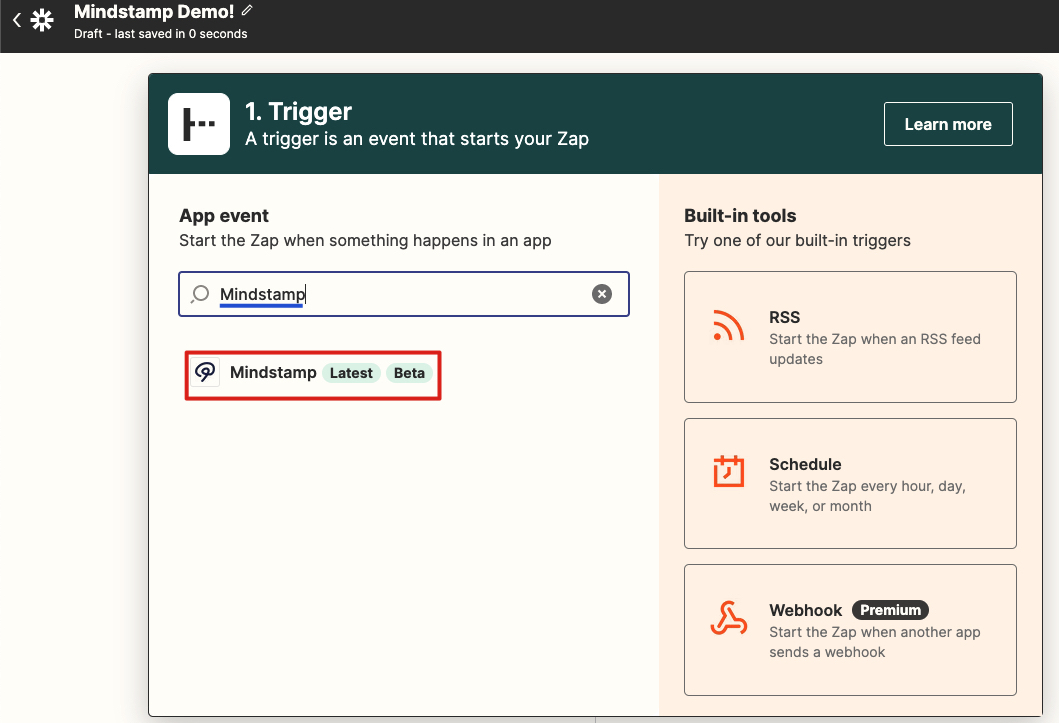
Set up your Trigger
Note
Throughout this documentation you will see reference to Mindstamp (1.0.0). This may differ from what you see since we are constantly improving your experience!
Once you have selected the Mindstamp app, you can choose your event. There are 3 events with this Integration.
- New View: Triggers when a video view takes place on Mindstamp.
- New Interaction: Triggers when a viewer makes an interaction with one of your videos.
- New Lead: Triggers when a viewer submits their name, email, phone, or custom ID in one of your videos.
Note
The returned data from the events are the same as the data returned from the View, Interaction, and Lead webhooks.
Select the one you would like to set up. For this demo, I will do 'New View'. The setup for interaction and lead will be the same!
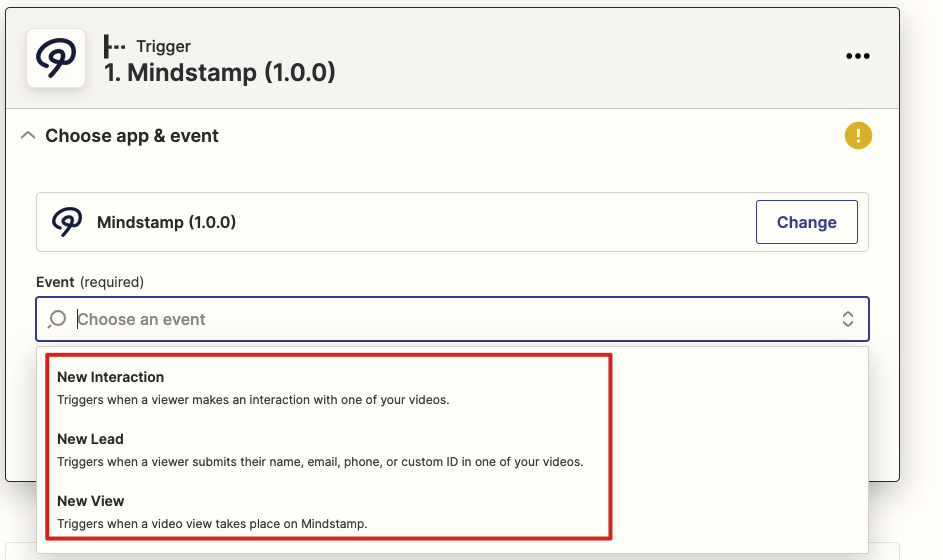
Trigger Events
After selecting the event, you will need to select the 'Choose Account' dropdown and select 'Sign in', to sign into Mindstamp. Selecting 'Sign in' will take you to your normal Mindstamp login page. Go ahead and put in your Mindstamp credential.
Once you have signed in you should see a page to authorize Mindstamp Zapier. Select 'Authorize' to continue.
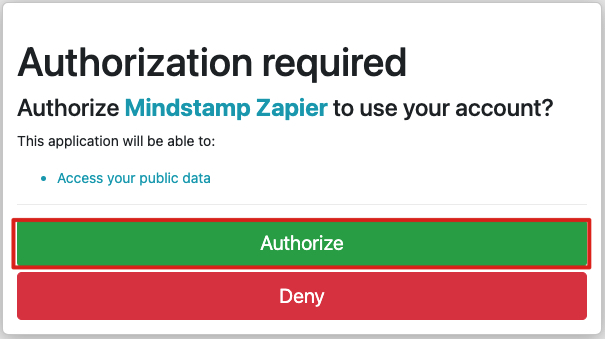
Authorize Mindstamp Zapier
Note
If you were taken to you Mindstamp Dashboard after you signed in and don't see the authorization page, close the popup and re-click the 'Sign in' button on the Zap setup page.
Once you have signed in, you can close out of the window that opened up and come back to the Zap setup page to complete this step of the Zap.
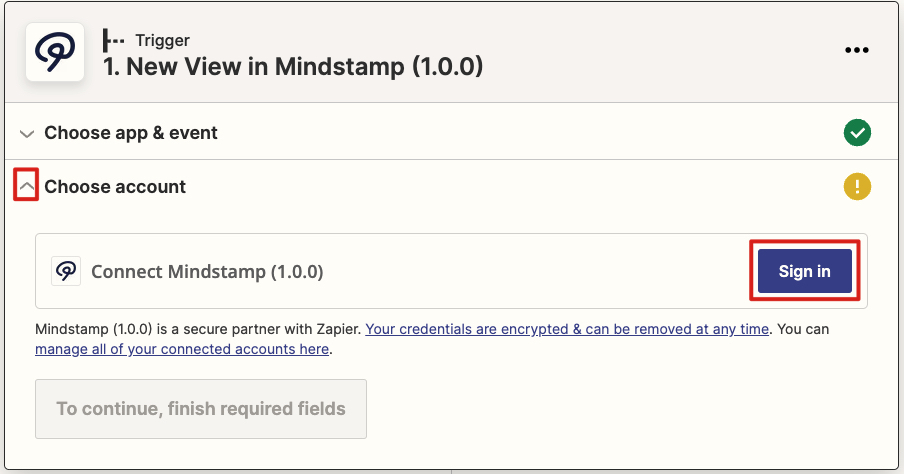
Sign into Mindstamp
Lastly, we will test the trigger is working appropriately and that we have been fully authenticated. Select 'Test Trigger' and you should see
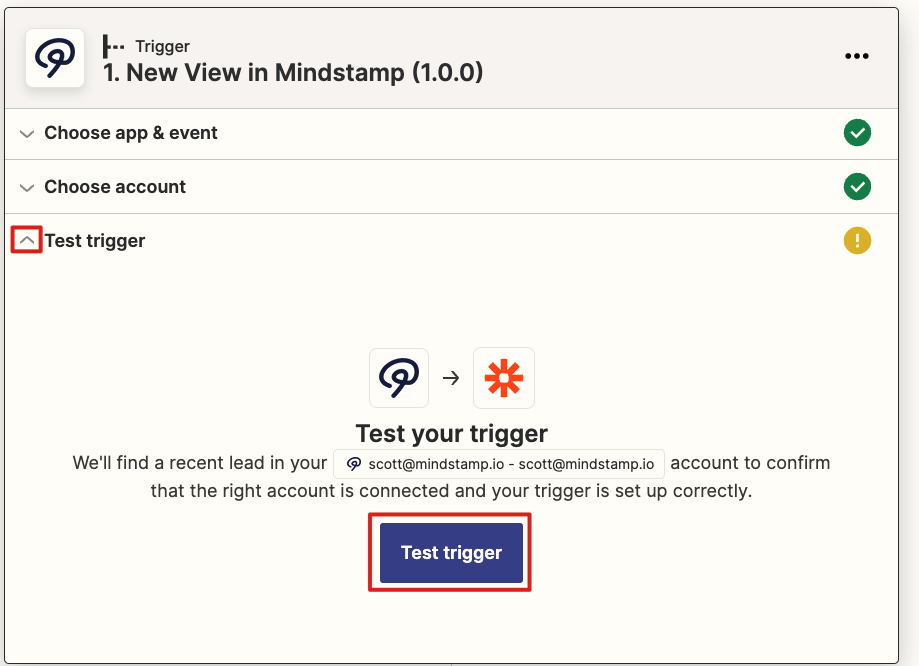
Test Trigger
Once the test is complete, you should see a message like this with a view object and all the pertaining attributes. Press Continue to move onto the next step.
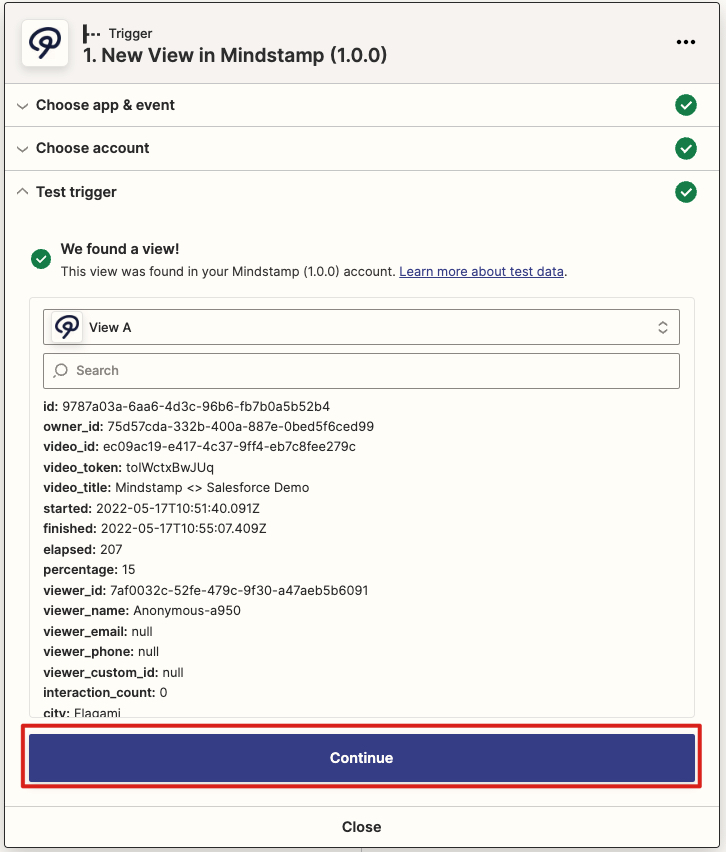
Test Trigger Success
Note
If the test trigger fails and you see an error message that says "We couldn't find a view" (or interaction or lead), then in Mindstamp, you will need to create a view, interaction, or lead. Since Zapier runs frequently, there needs to be recent (within ~2min of the test) views, interactions, or leads for Zapier to find any.
2. Set up an Action
Once we have the trigger defined, we can select the application that we want to do something in. For this demo, we will send an email.
Note
Due to the thousands of application the Zapier supports, an extensive walkthrough of the application you are trying to connect to is not feasible. This simple email zap should get you started, but if you ever have any questions on a specific app, the Mindstamp Engineering team is here to help!
To do this search for 'email' and select the 'Email by Zapier' application from the results.
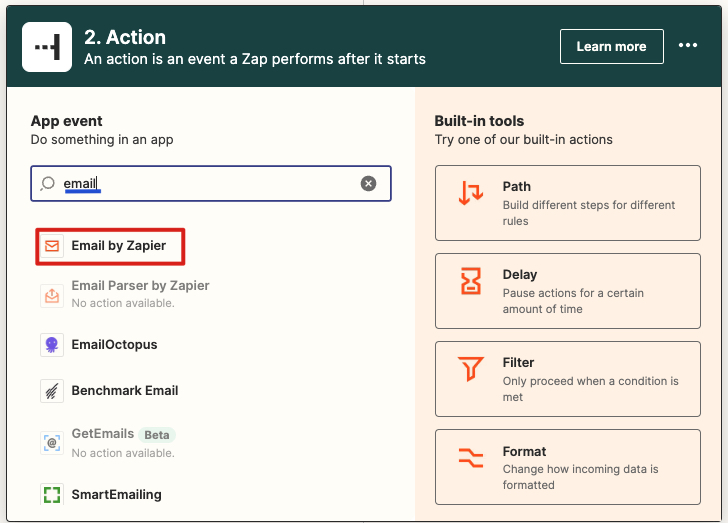
Set up an action
From there we can choose our event. Since there is only one option, we will send an outbound email.
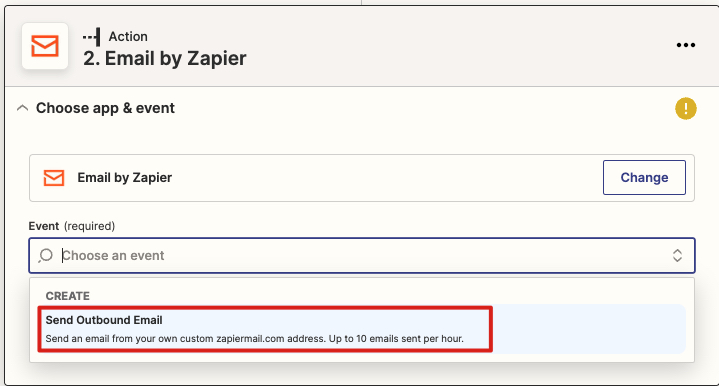
Send Outbound Email
For the email, we will input some of the important information that we want, and you will be able to select any of the fields that we received from our trigger. You can see below we are using video title, started, and percentage watched in the body of our email.
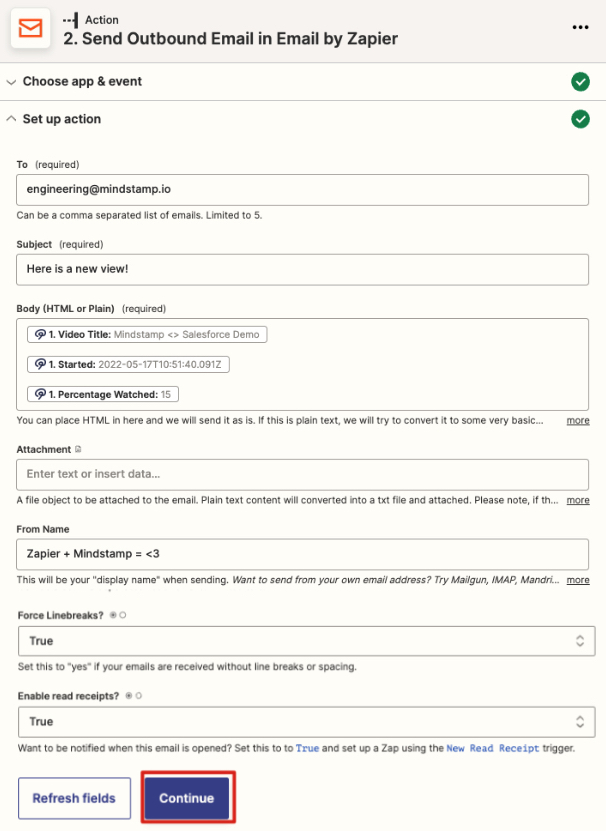
Email Preferences
We can now test our action by selecting 'Test & review' or 'Test & continue.' By doing 'Test & review' you can troubleshoot the configuration if the test fails. So this option is recommended.
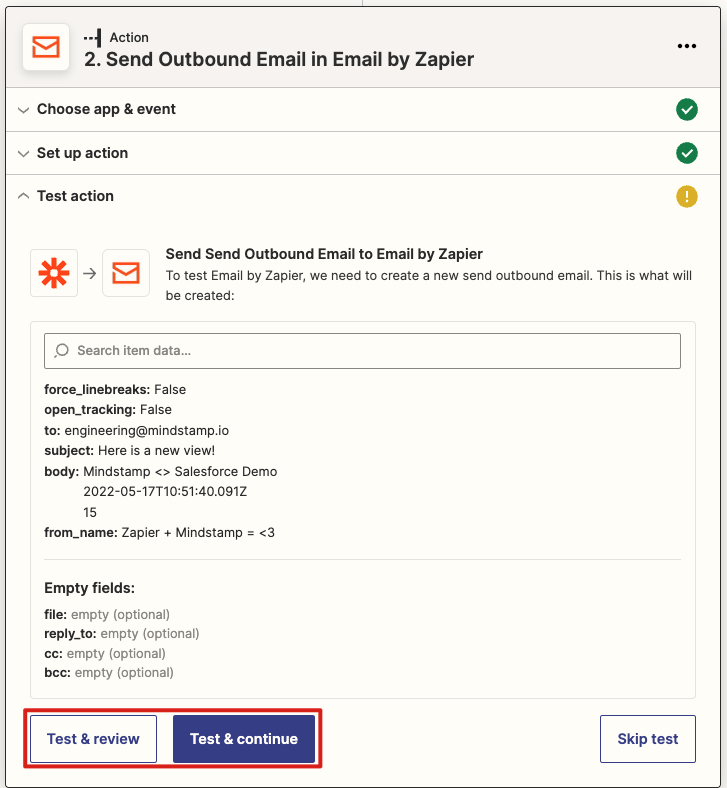
Test Configuration
Lastly, we have 2 options, we can either publish our Zap (and we'd be done!) or we can add more actions by selecting the + sign at the bottom. The possibilities are endless!
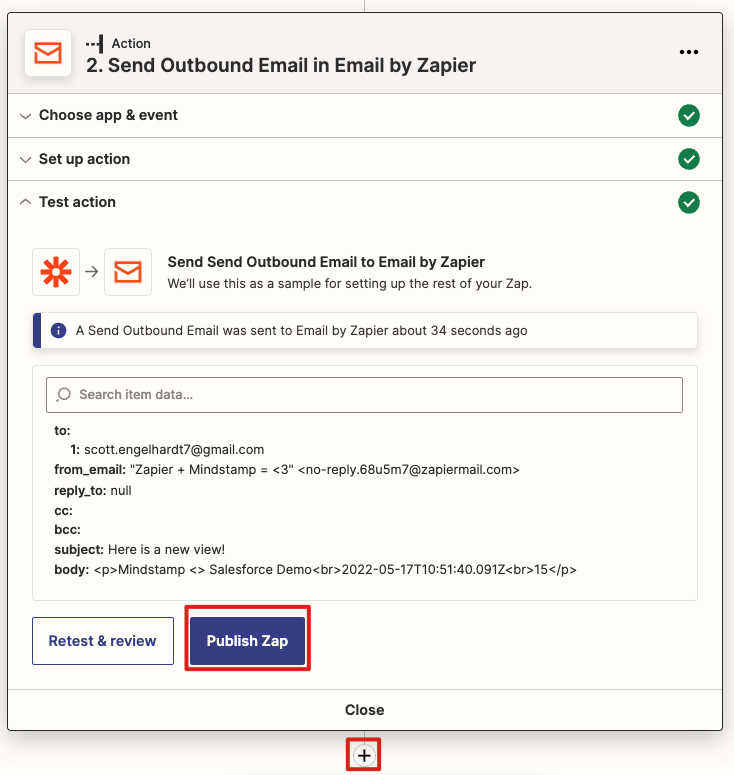
Publish
Once you select 'Publish Zap,' you can choose 'Publish & Turn On' in the pop up window.
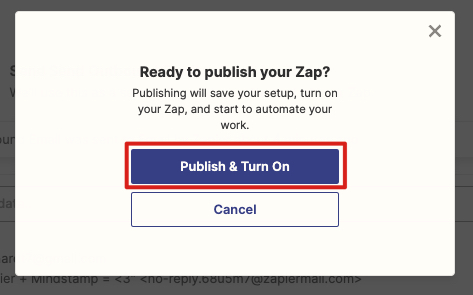
Publish (but for real this time)
And that's it! You are done and your Zaps are zapping!
Get in Touch
Need help or want to know more about using Zapier with Mindstamp? We're here for you! Contact [email protected] to learn more.