Summary
This step will walk you through how to set up a Salesforce site to recieve Mindstamp Webhooks.
Setup a Custom Salesforce Domain
To create a Site that will receive the Mindstamp View Webhook, click on the Gear in the upper right of Salesforce and click Setup.
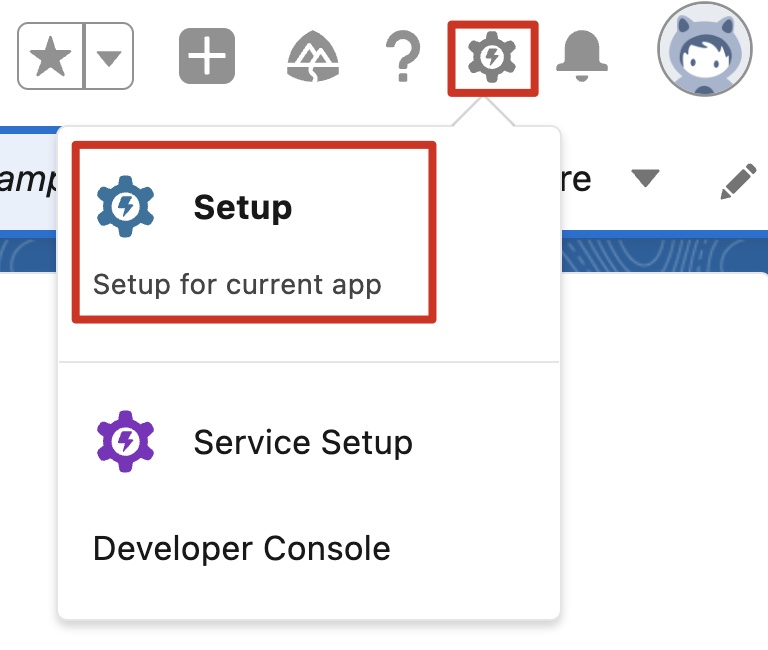
Access App Setup
Search for Sites and click 'Sites' under 'Sites and Domains'.
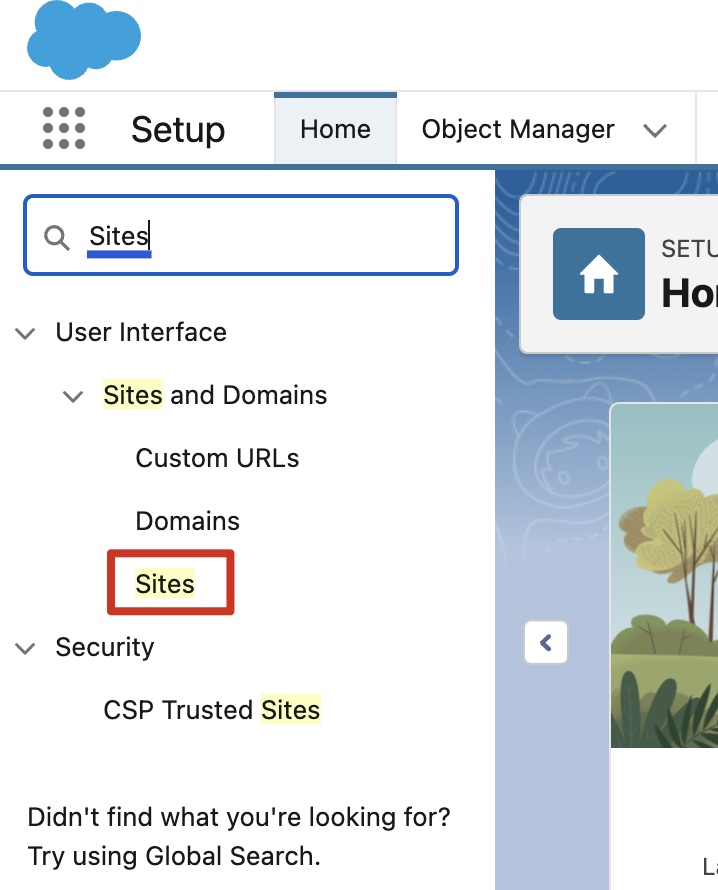
Sites
Here you will create a unique, custom Salesforce domain. This domain will be used to recieve the Webhooks from Mindstamp. Be sure to select 'Check Availability' to ensure the domain name is valid. Once you have an acceptable domain name, select 'Register My Salesforce Site Domain'.
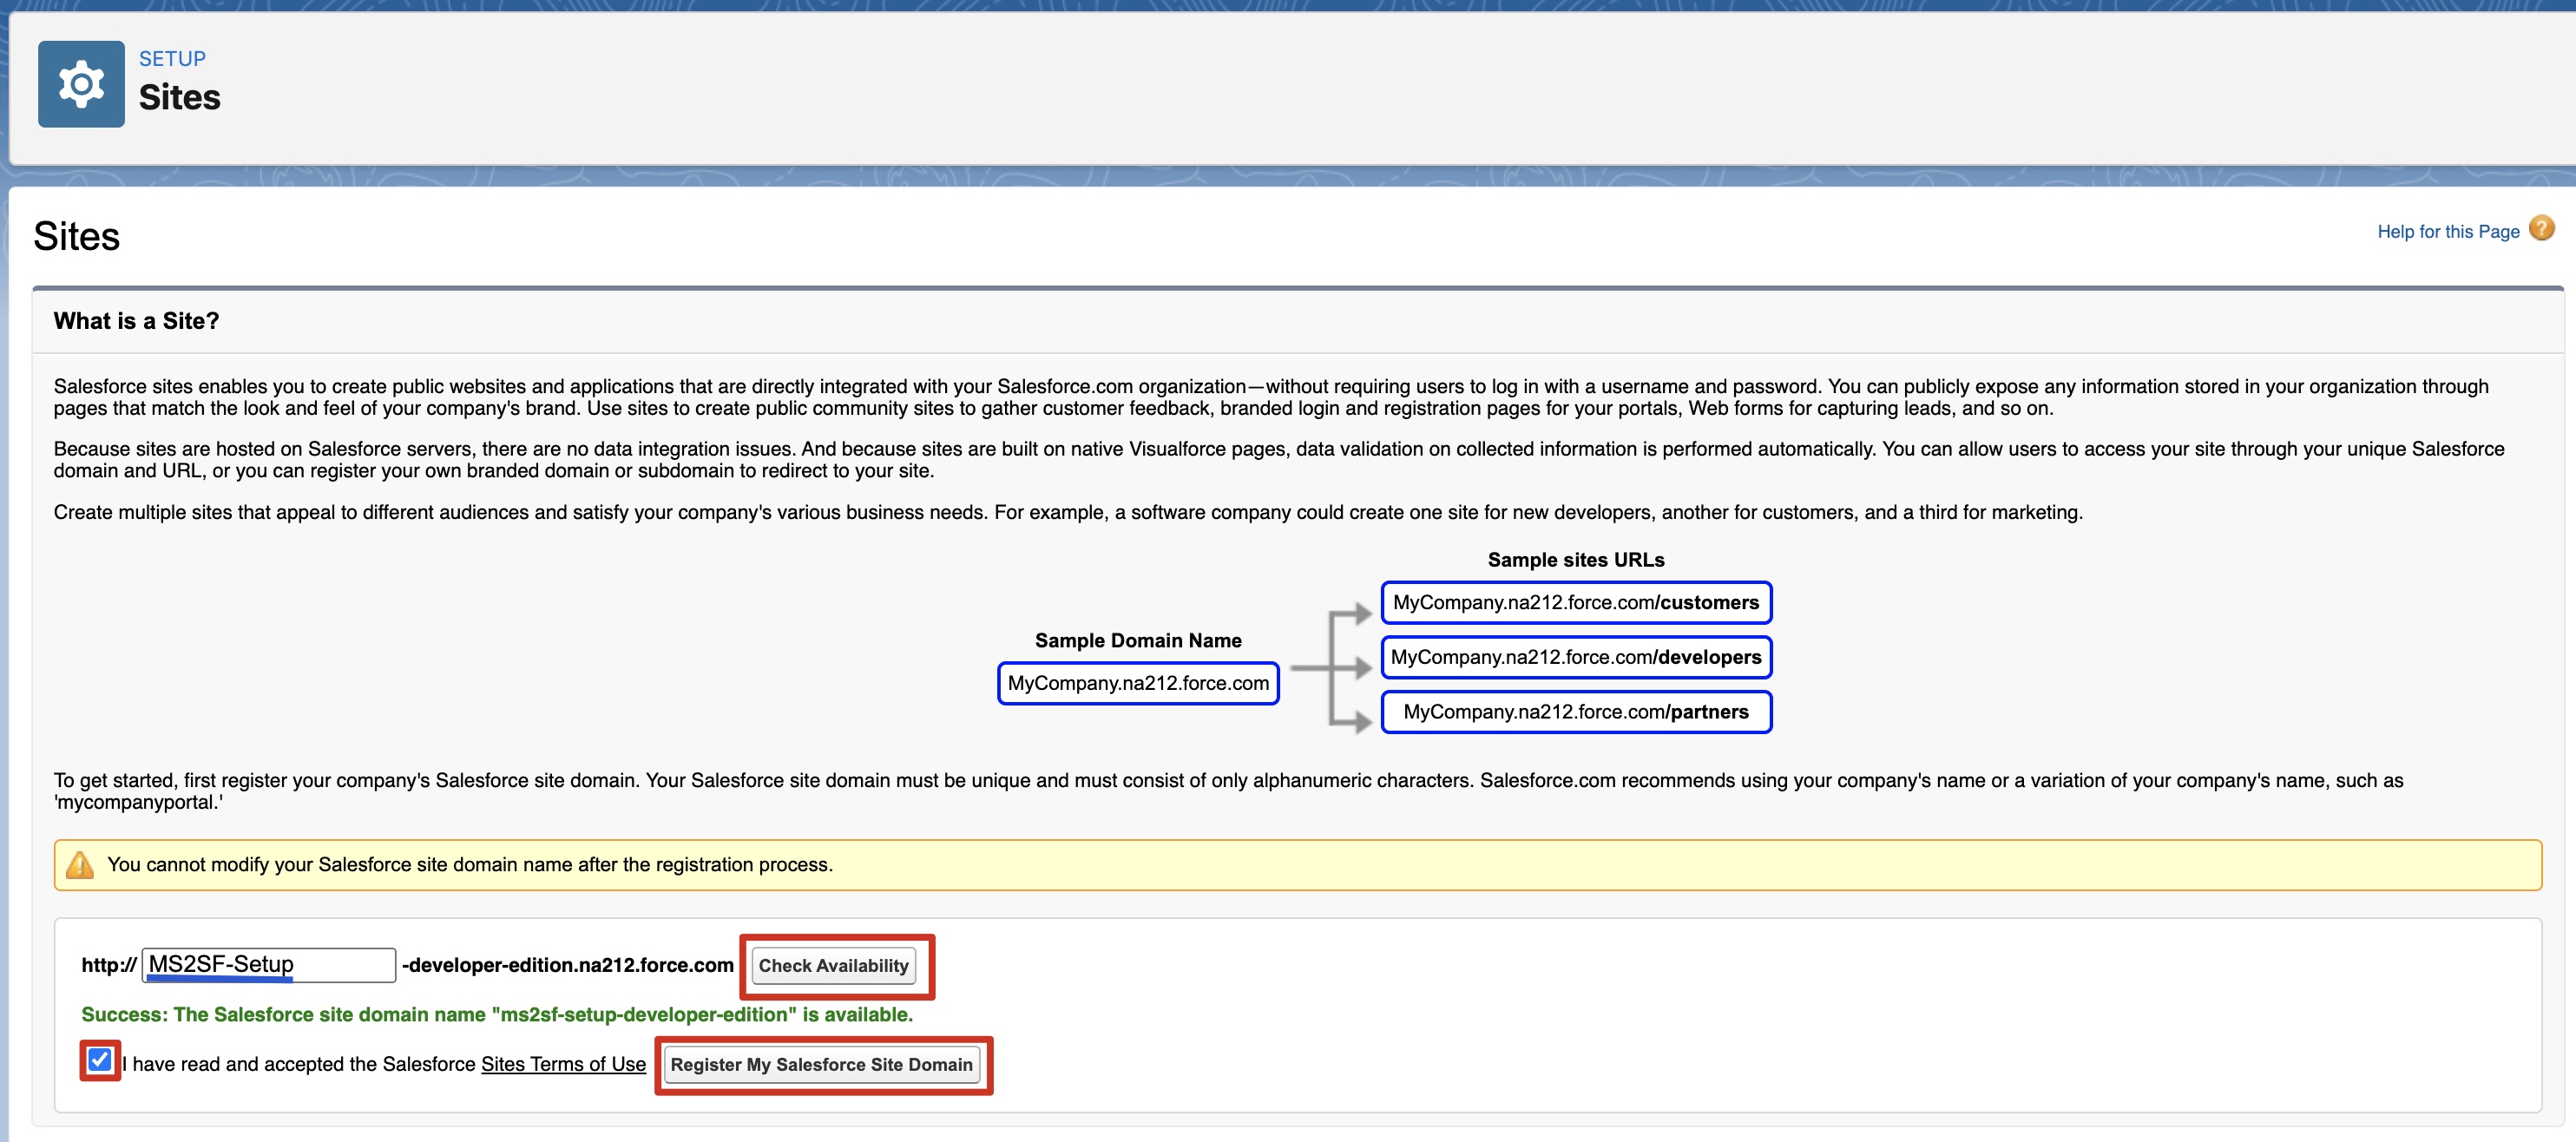
New Domain Setup
NOTE: MS2SF-Setup is an example domain. You can use something more specific to your company or use case.
Create a Salesforce Site to Receive the Mindstamp View Webhook
On the next page after registering the domain, we will need to create a new site. Toward the bottom of the page, select 'New'.
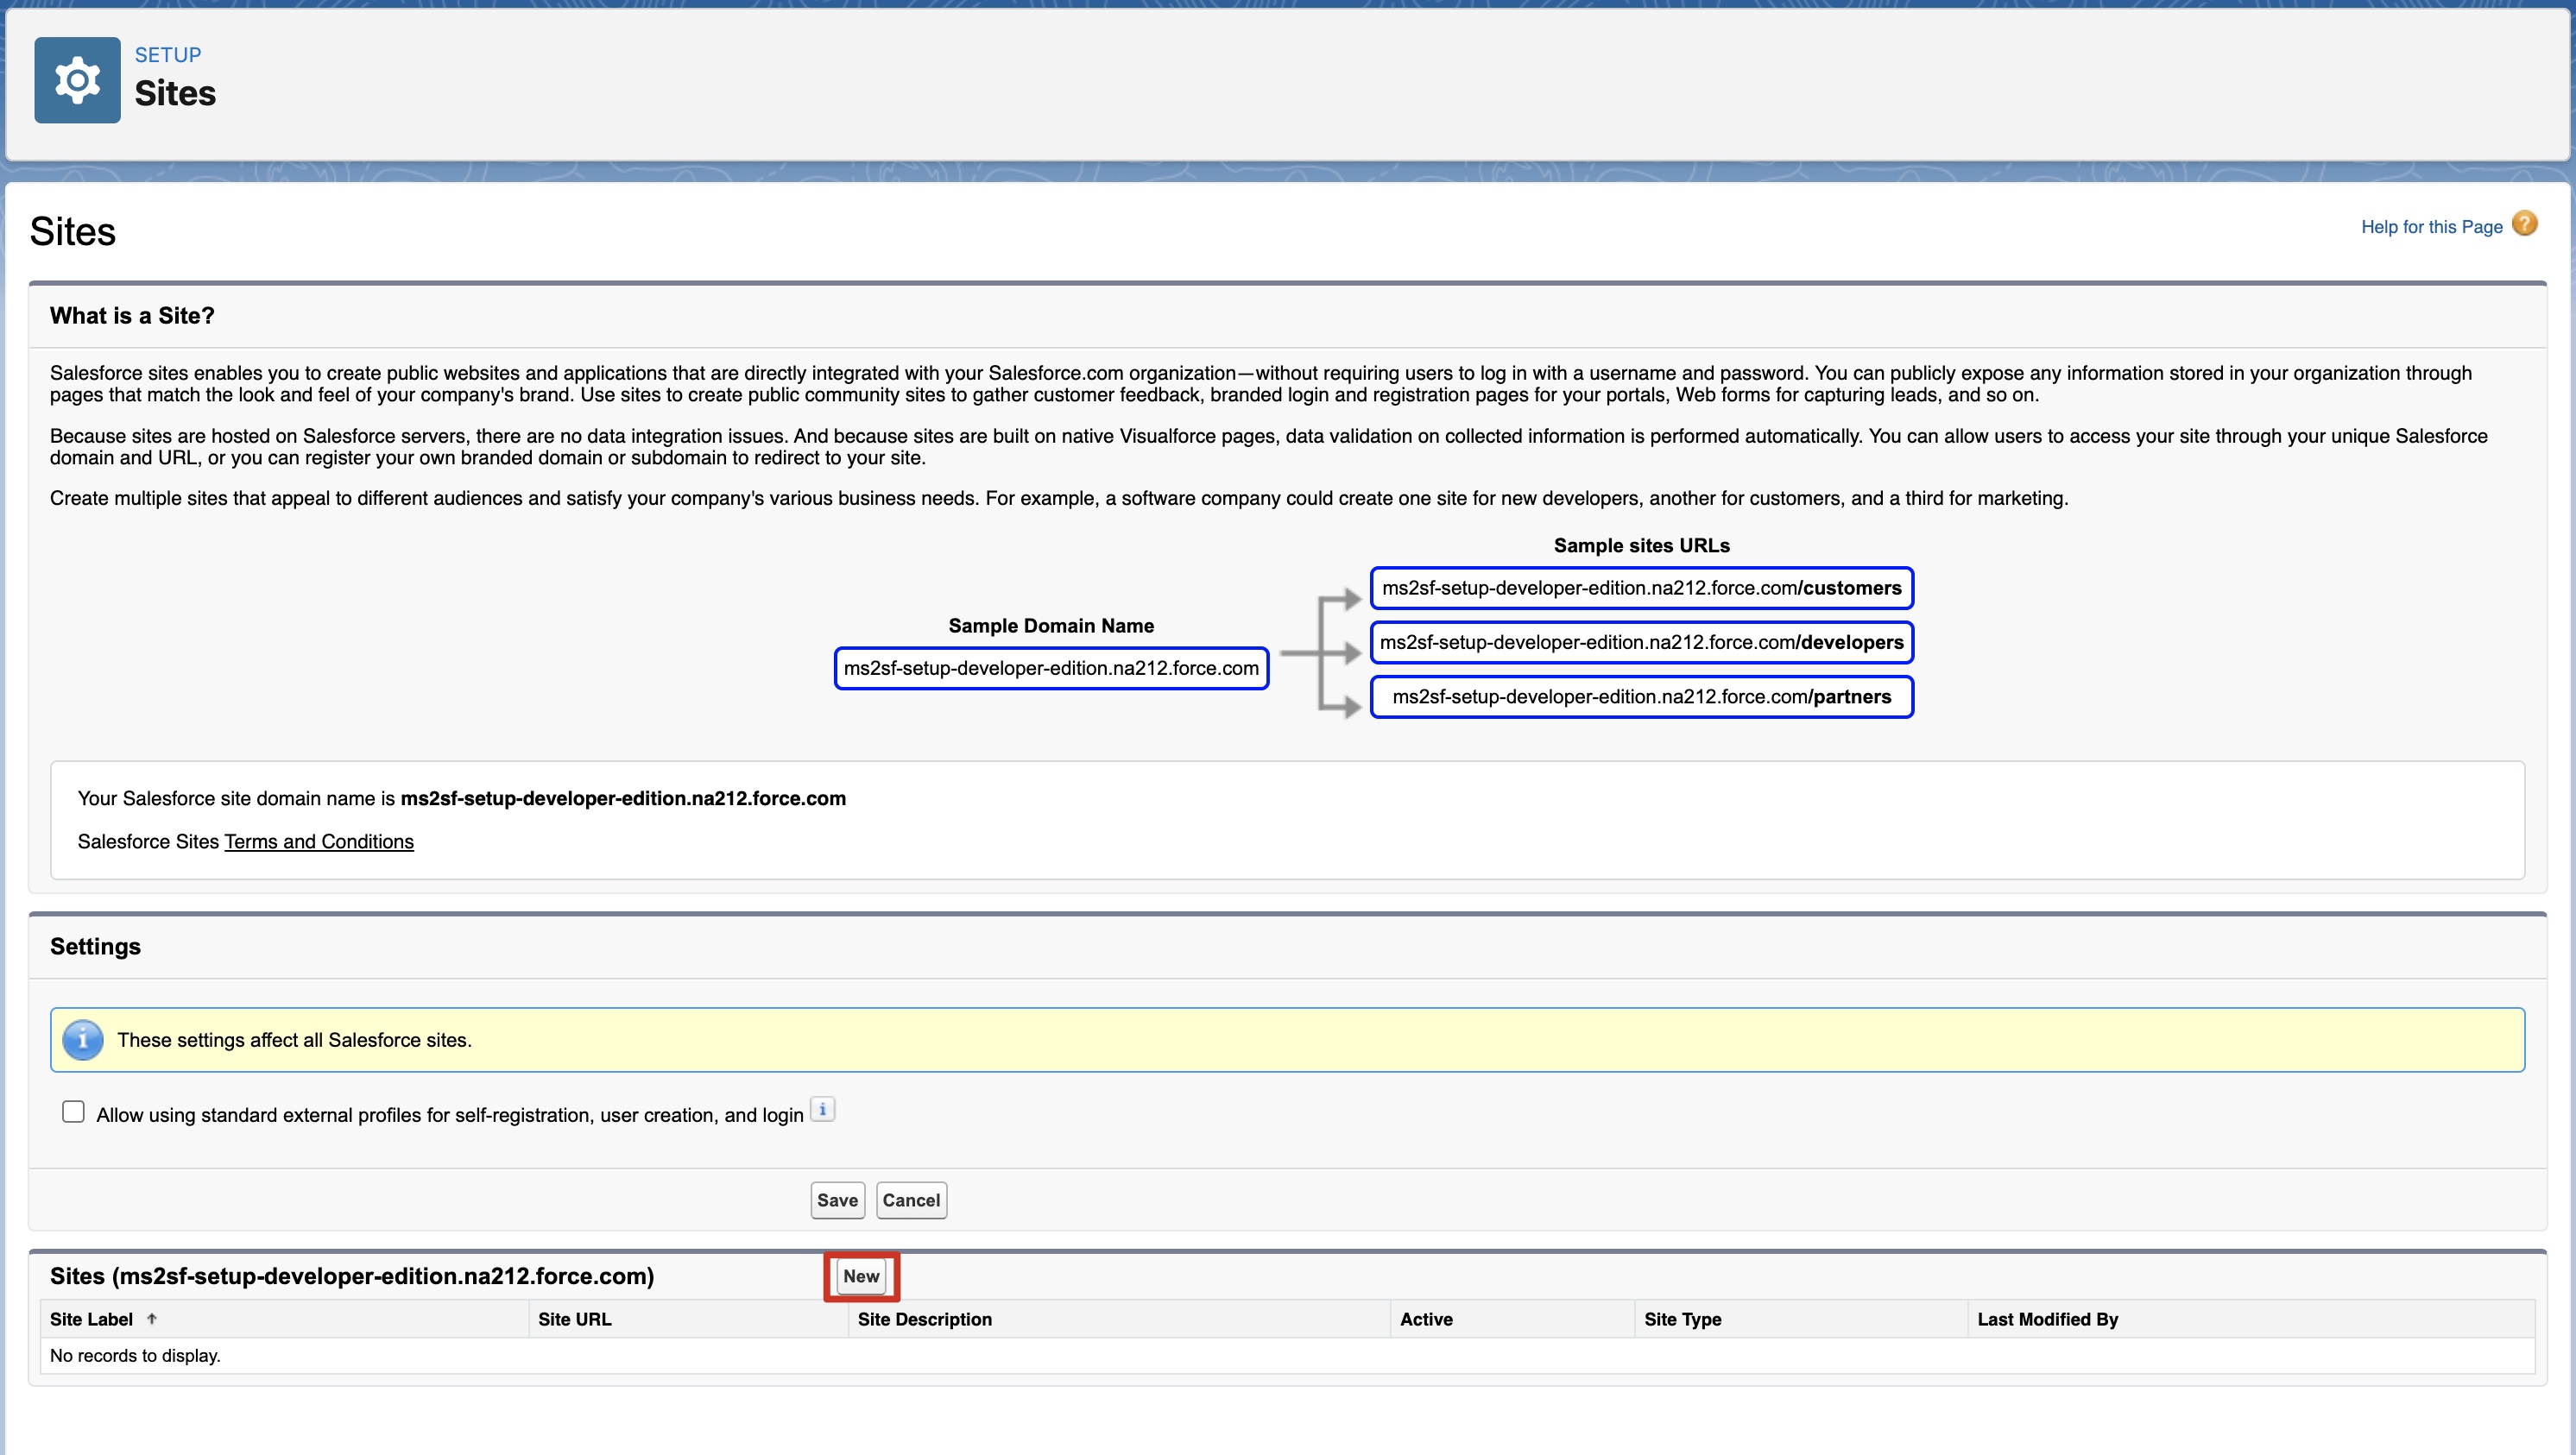
New Site Setup
Enter the values or check the field as follows then select 'Save'.
| Field | Value |
|---|---|
| Site Label | Mindstamp |
| Site Name | Mindstamp |
| Active | Check |
| Active Site Home Page | SiteLogin |
| Clickjack Protection Level | Don’t allow framing by any page (Most Protection) |
| Lightning Features for Guest Users | Uncheck |
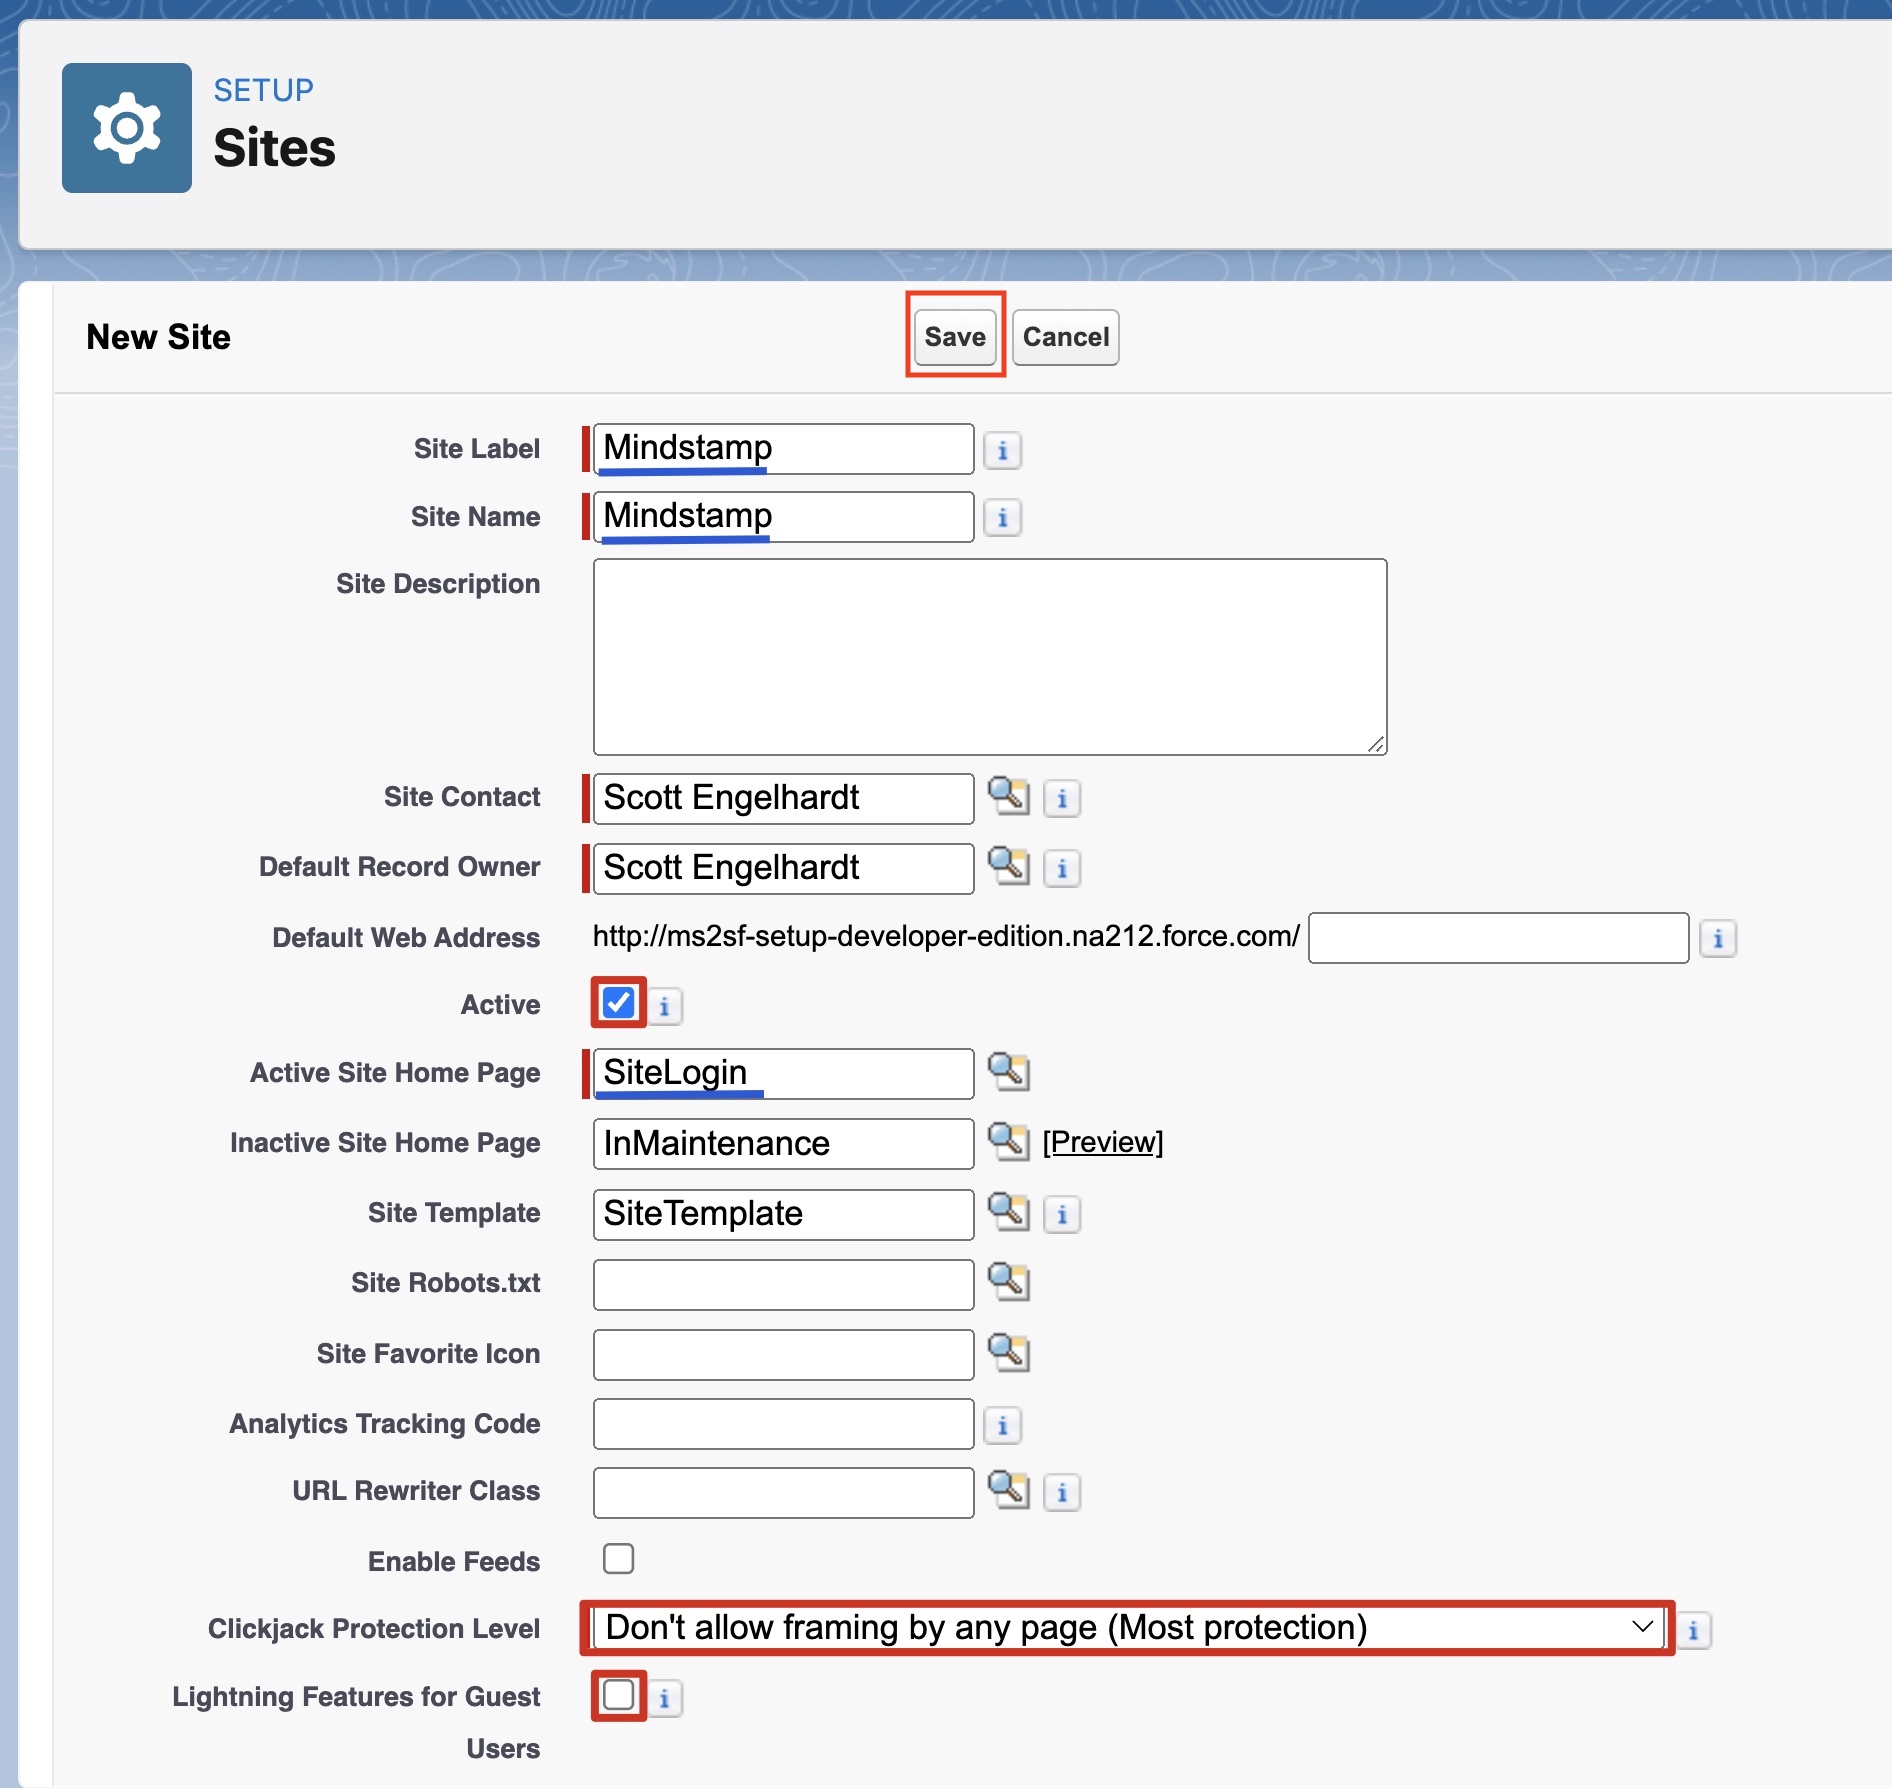
New Site Configuration
Configure Webhook Access to New Site
Once your site is setup, you will be taken to the site details where you can confirm your settings. From this page, we will need to enable Mindstamp Webhook access to Salesforce.
First, select 'Public Access Setttings'.
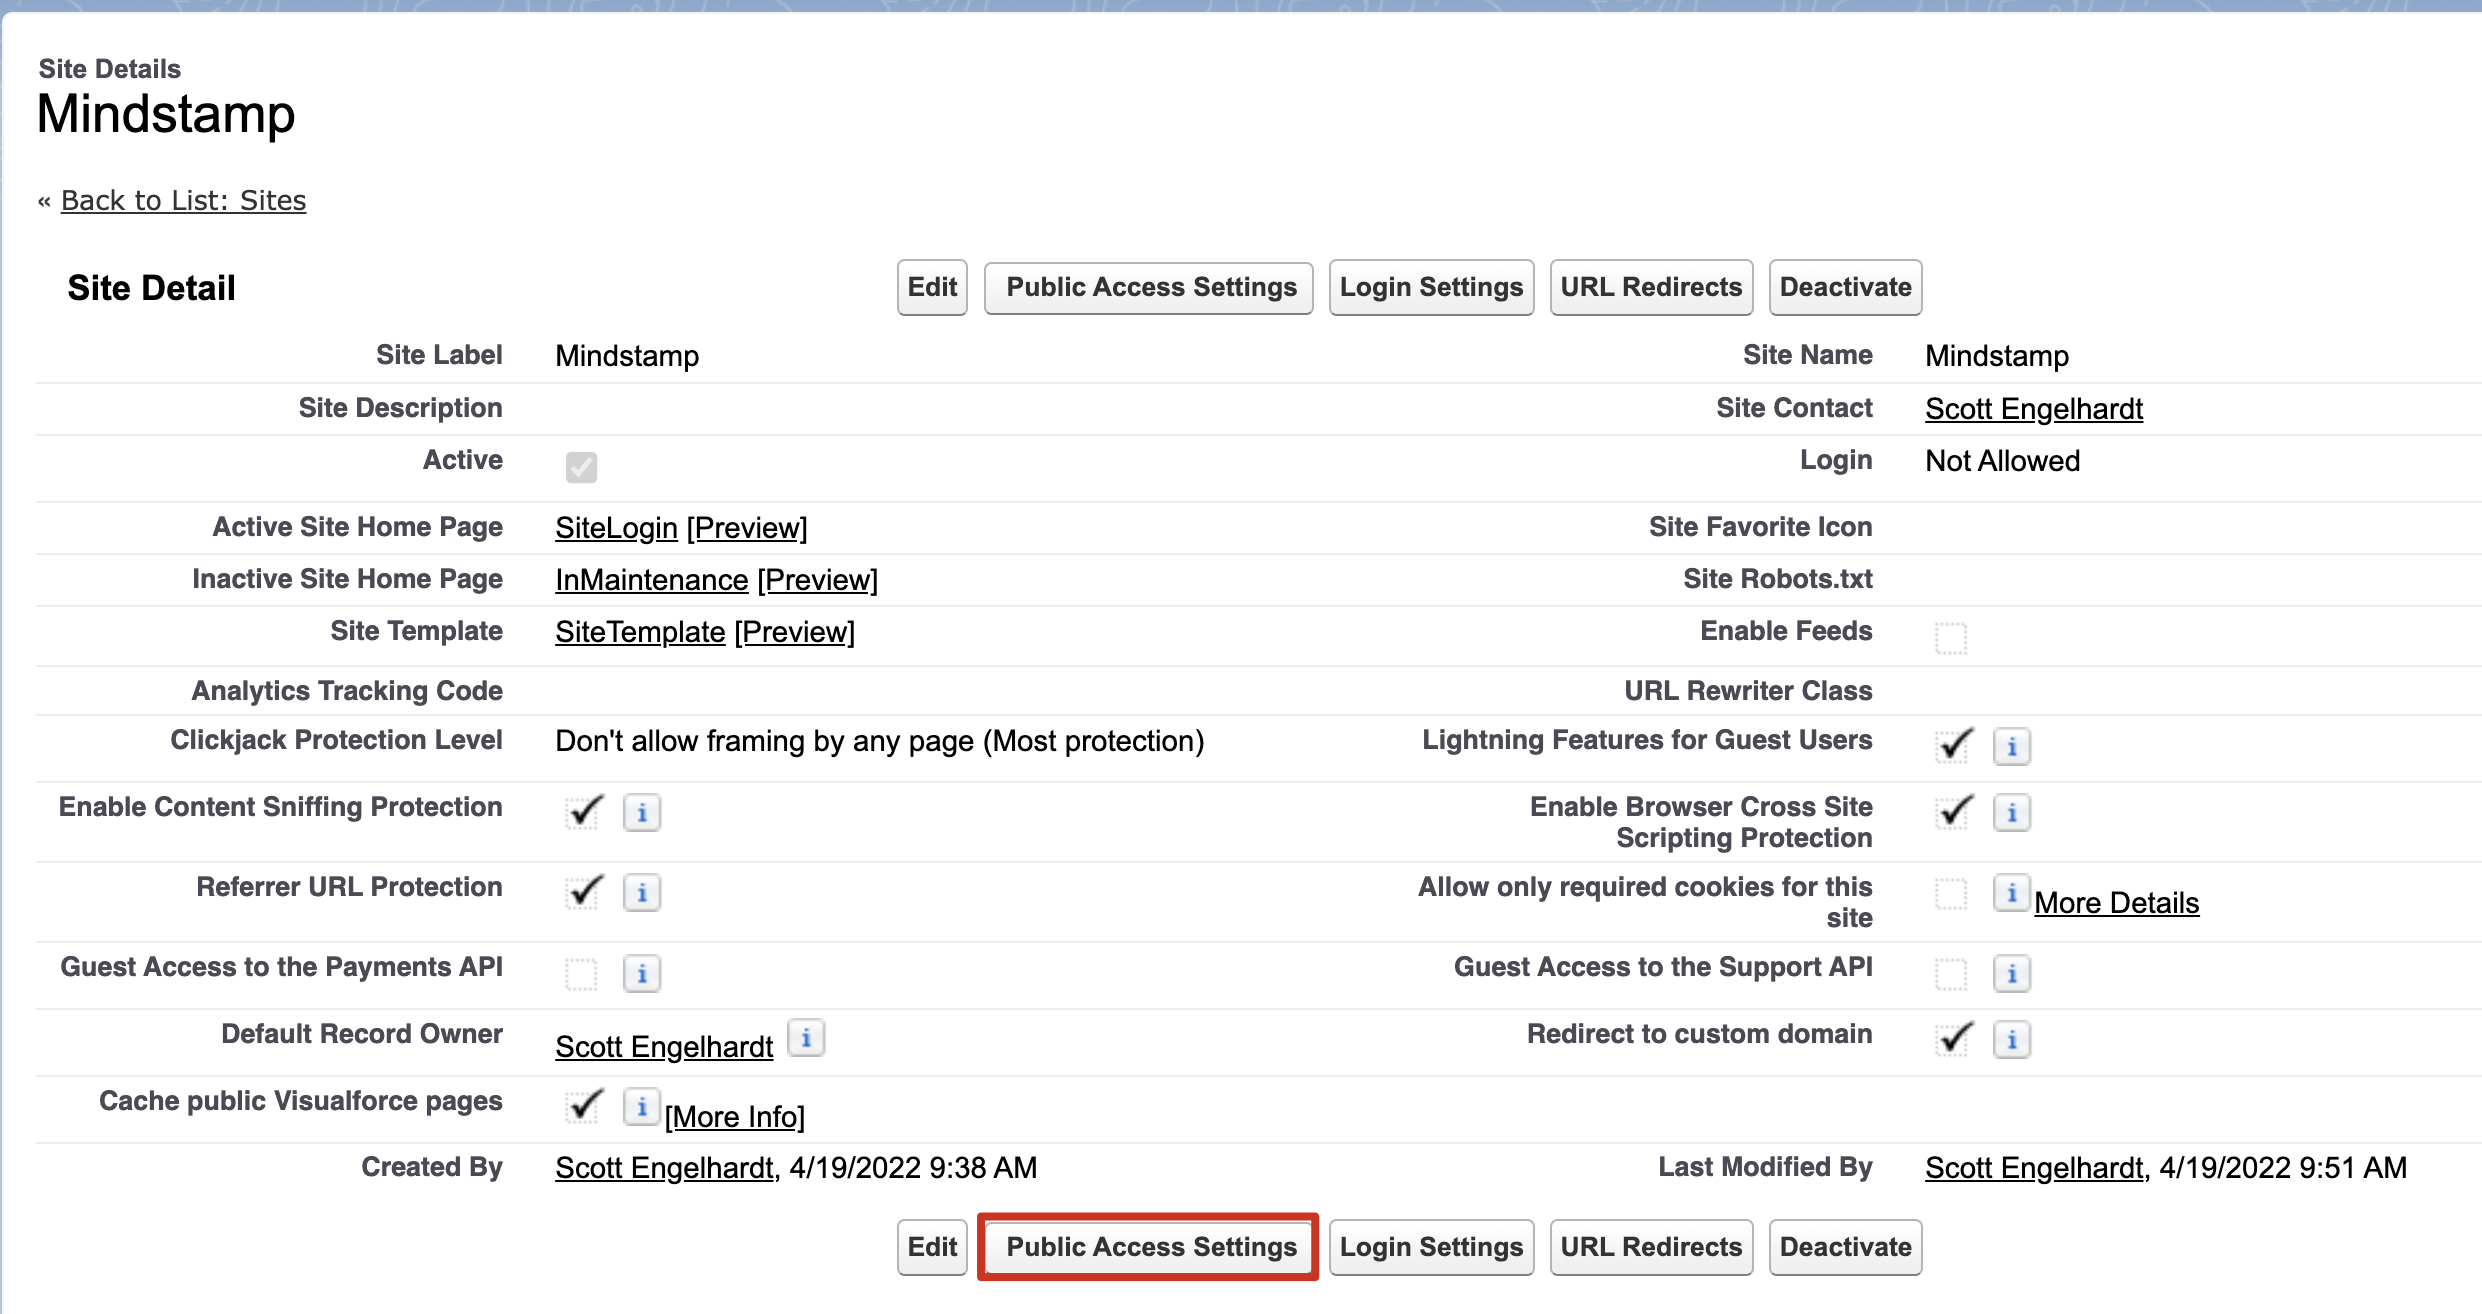
Public Access Settings
On the Profiles screen that opens, hover your mouse over the 'Enabled Apex Class Access' link and select 'Edit'.

Enabled Apex Class Access
Add 'ms2sf.MindstampWebhook' to the Enabled Apex Classes list and click 'Save'.
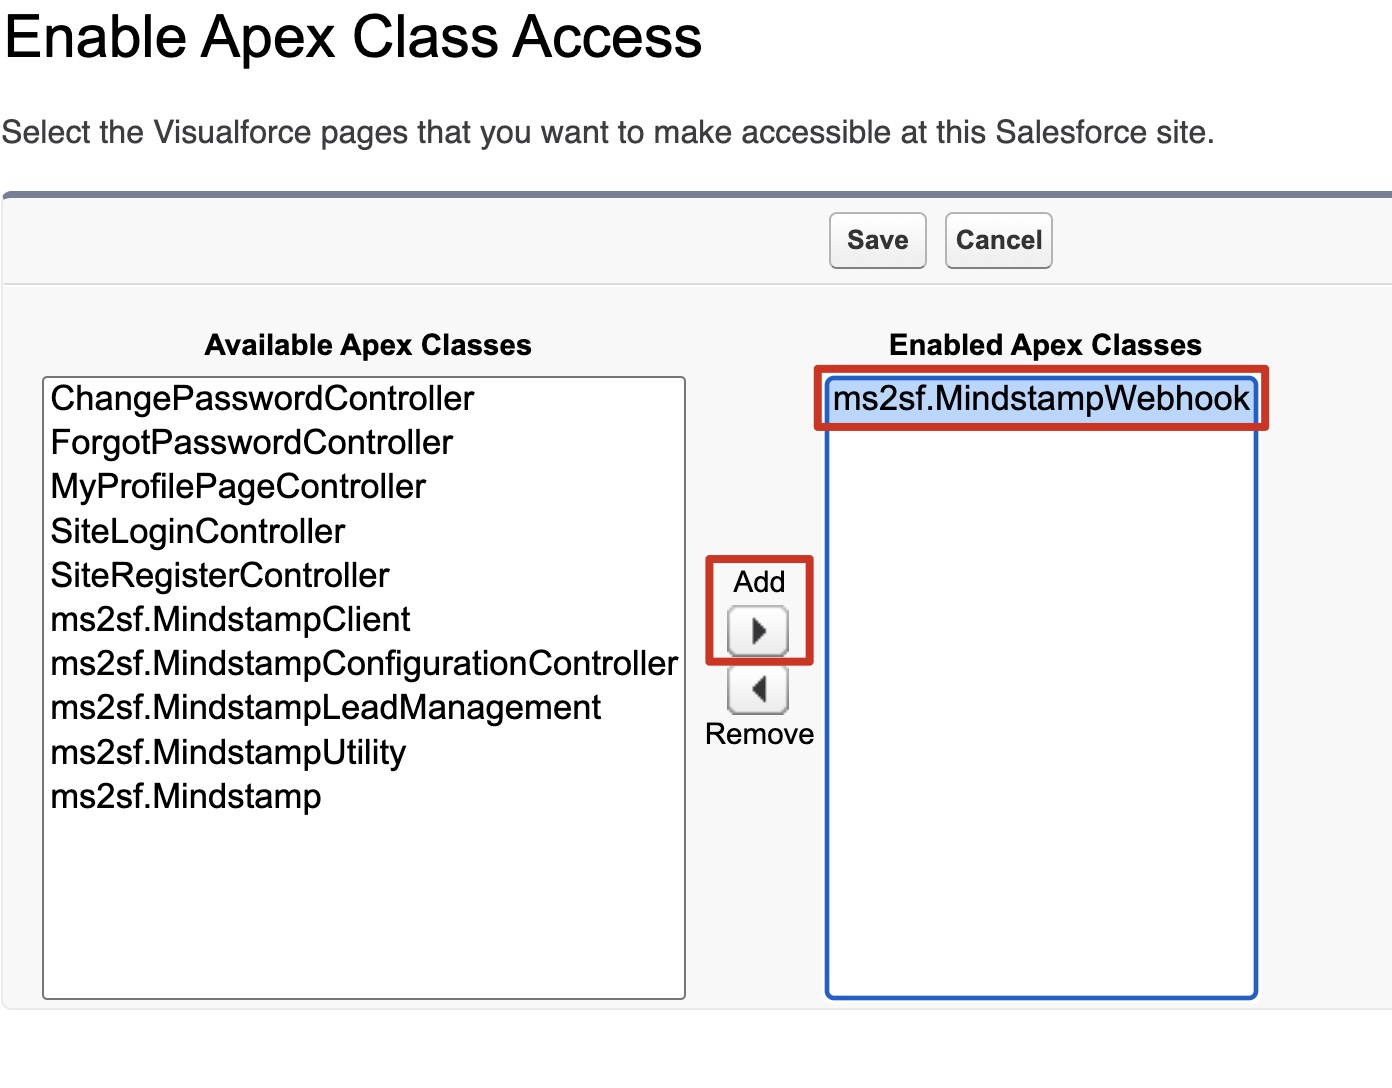
Enable Mindstamp Webhook
Test and Confirm Webhook Site URL
Return to Sites Setup by searching for Sites under 'Sites and Domains'.
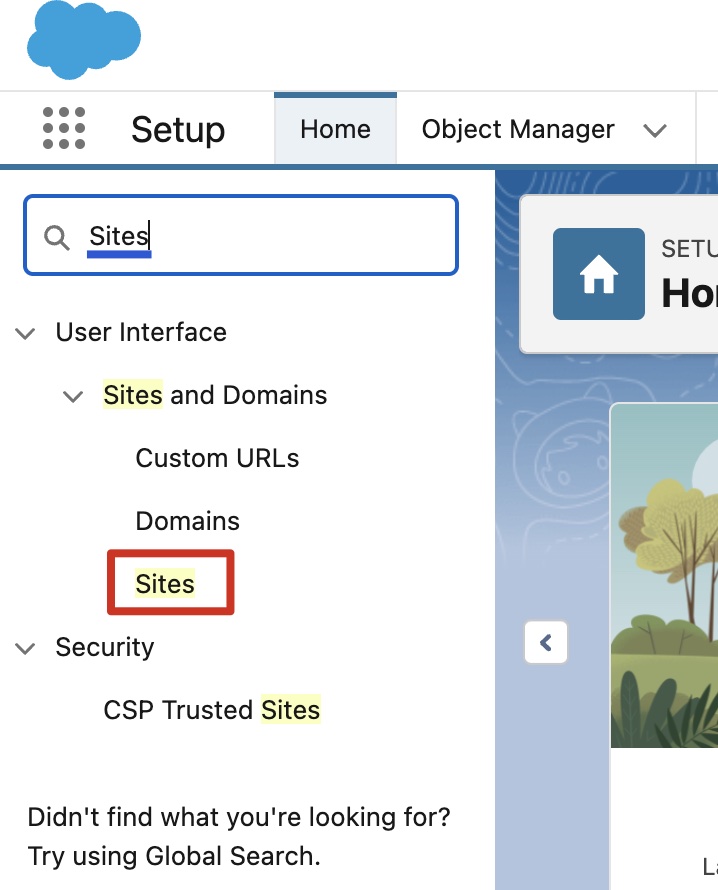
Sites
Click on the newly created Site URL.

That will bring you to a default login screen.
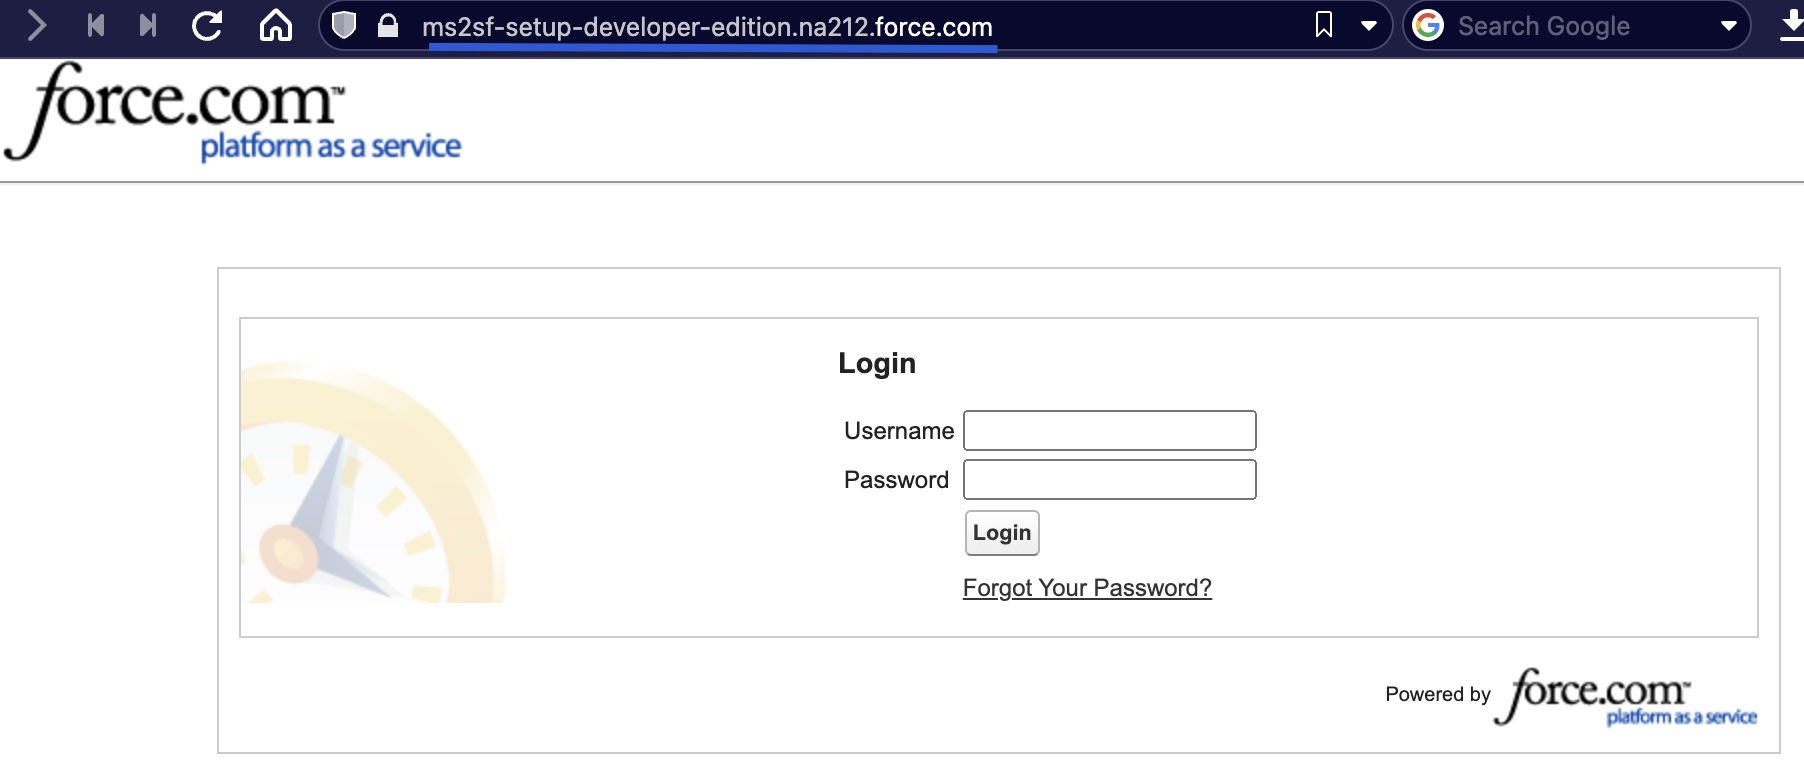
Default Site
Modify the URL structure to add the following to the end of the URL and load the page.
/services/apexrest/ms2sf/mindstamp/incoming/v1
You should see the following result, confirming that the endpoint is listening, but that a ‘GET’ command is not allowed. Ignore the ‘Error’ warnings.

Successful Endpoint Setup
Keep this link (with the added extension) handy. It will be use in the next step where we will configure Mindstamp to send webhooks to our Salesforce site.
Get in Touch
If you have additional questions regarding this setup, please contact us at [email protected].