Turn your interactive videos into immersive shoppable experiences
Prerequisites
In order to start using the Shopify <> Mindstamp integration, you will first need an active Shopify store and you will have needed to follow the Connecting To Shopify instructions.
Getting Started
Once you have Shopify connected to your Mindstamp account, you can create shoppable videos in two ways. You can add individual products to your videos by using the "Add To Cart" click action or you can select the "Make This Video Shoppable" button in the Integrations tab in the video editor to streamline the process.
Adding Individual Products
Using an existing Mindstamp video, you can add individual products to your videos. From the video editor, you can use the "Add To Cart" click action on Buttons, Images, Hotspots, and Text interactions.

Interactions That Support "Add To Cart"
For this demonstration we will create a button and select the "Add To Cart" Click Action.
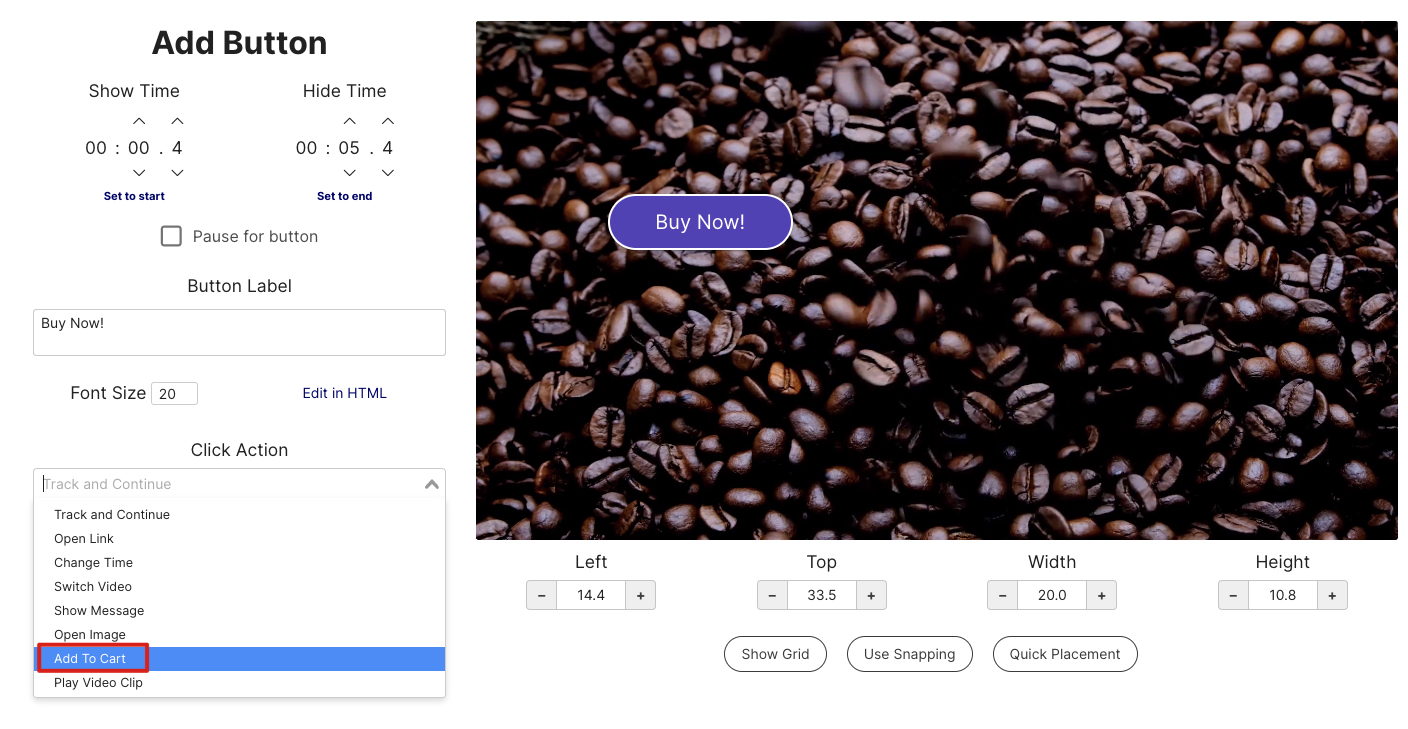
Selecting the Click Action
From there, you are able to select the products that you would like to use for the video.
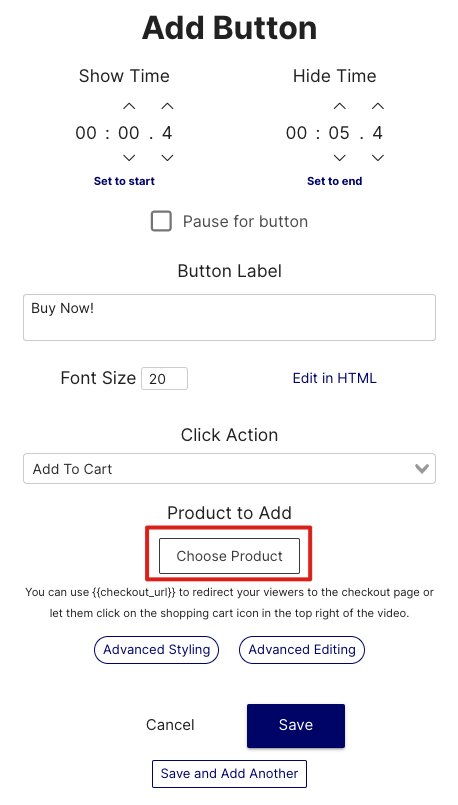
Choose Products
After selecting "Choose Product," you will see a dialog with all of the products in your store.
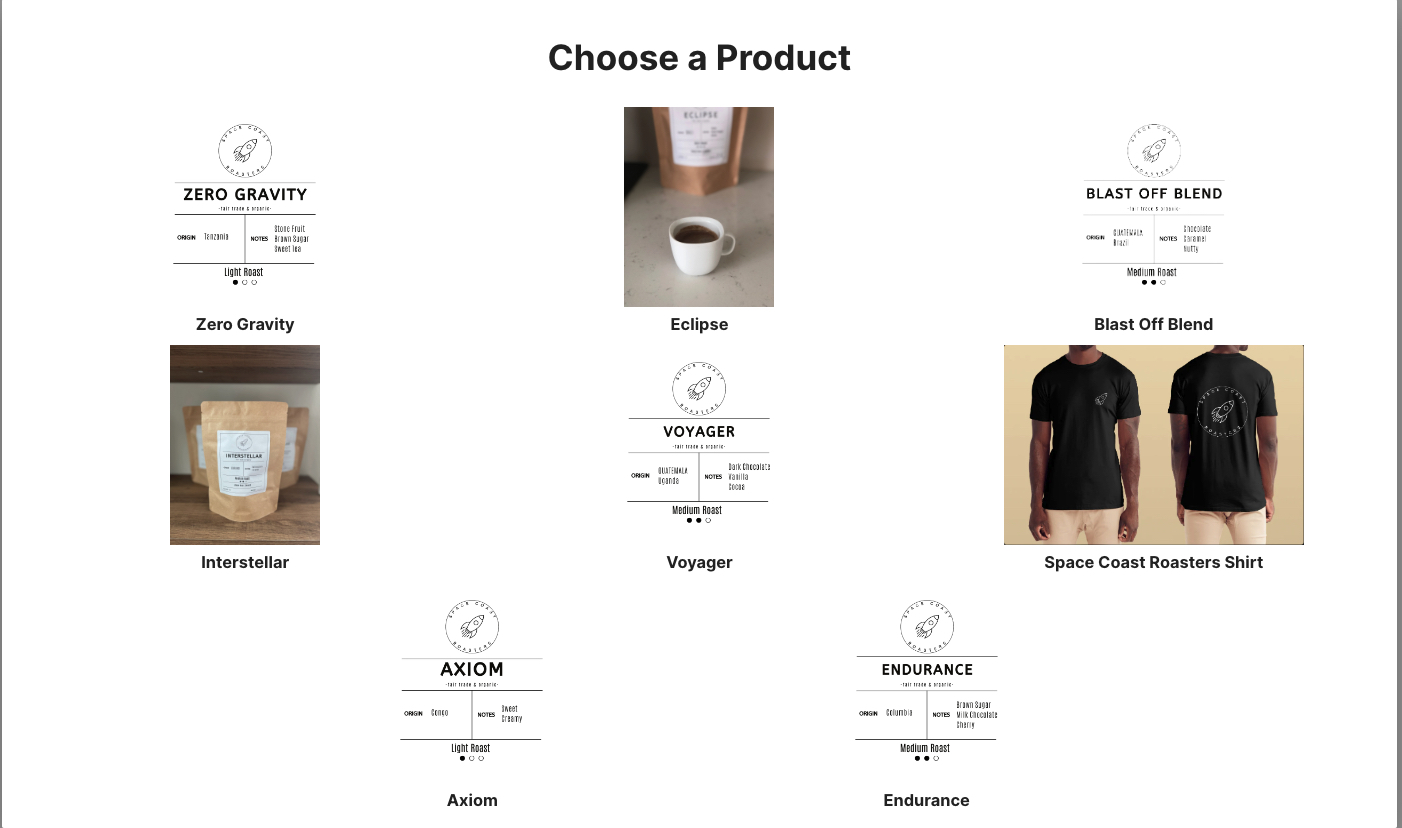
Your Store's Product
From this window, you will need to select one of your products that you would like to add to your video. Then, you will need to select a variant of that product.
If you don't have a variant set up on your product, you will see the default value provided by Shopify.
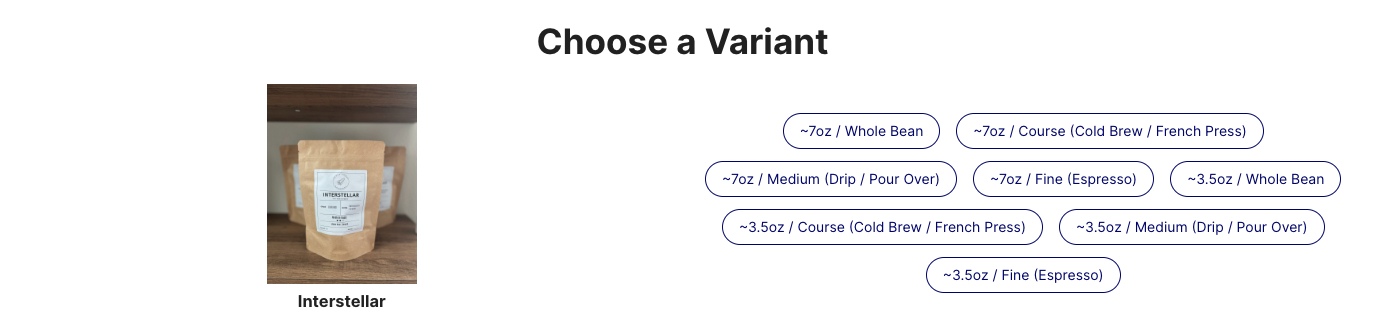
Your Product's Variants
After selecting the variant, you can save your interaction.
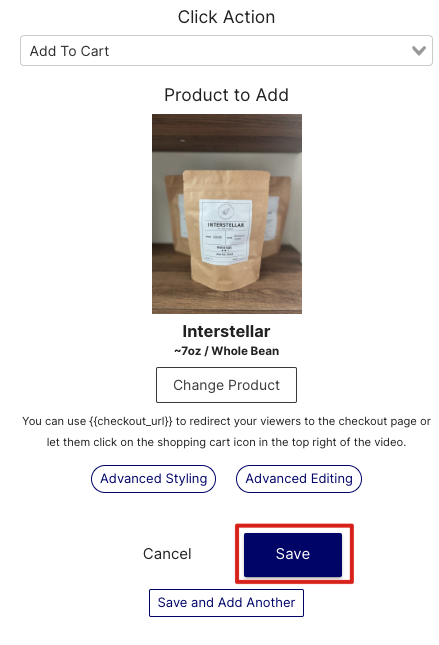
Save Interaction
After adding a product to your video, you can use the {{checkout_url}} variable on any interaction or navigation or in the End Call-To-Action. This will take the viewer directly to the checkout page.
You will then see the button in your video. Once you click on the button, you will see the shopping cart icon with the number of products in your cart.
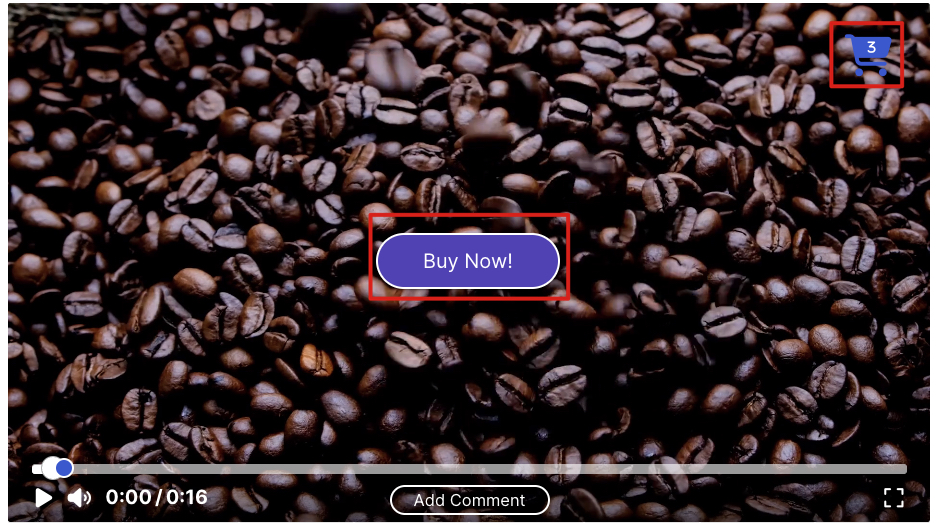
Shopping Cart Icon
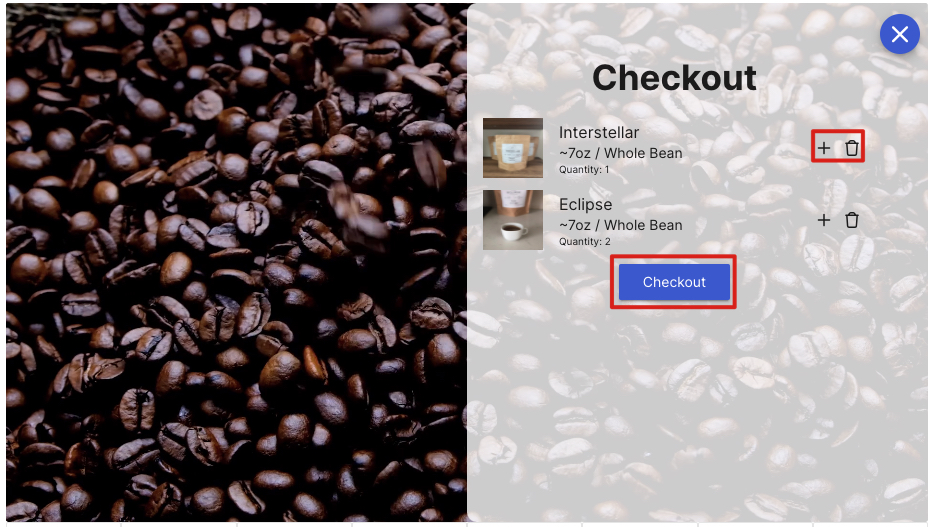
Clicking on the Shopping Cart, you will see all of the products you have clicked on. From there, you can see the details of all of the items in your cart and you can increase or decrease the number of items you have in your cart by clicking the plus icon or the trash icon. You can also go to checkout by clicking "Checkout."
In Video Shopping Cart
Upon clicking the "Checkout" button, the viewer will be taken to the checkout page for payment.
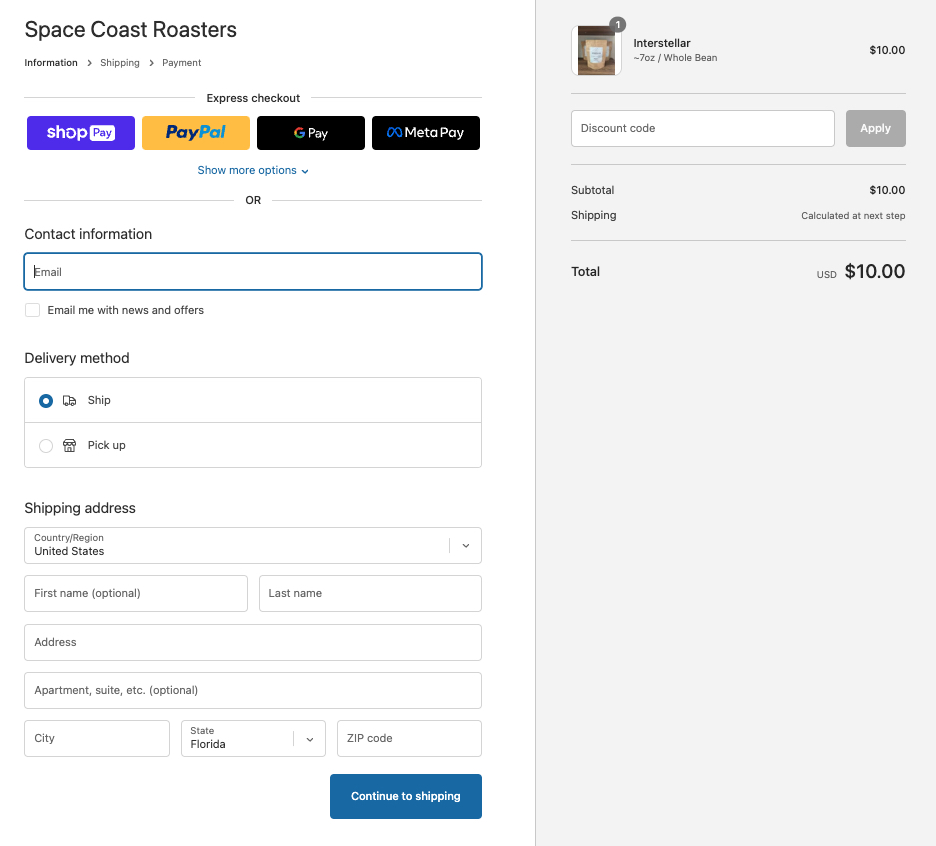
Checkout Page
Converting a Video to a Shoppable Video
The quickest and simplest way to make a video shoppable can be found on the integrations tab of the video editor.

Integrations
From there, select "Make This Video Shoppable" under the Shopify section.
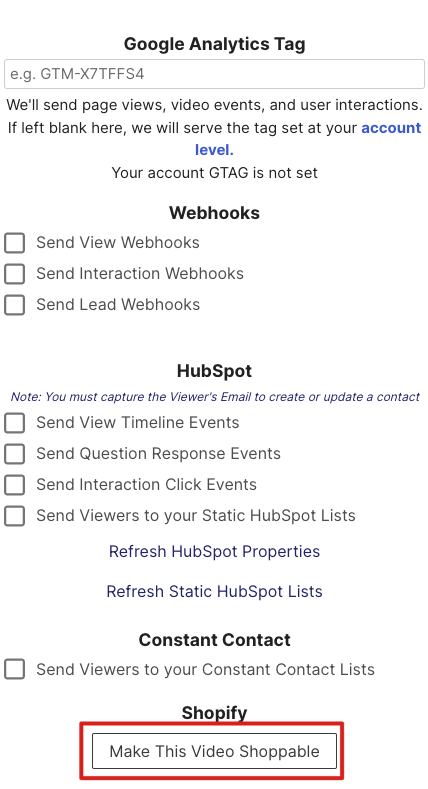
Make This Video Shoppable
You will then be take to another page were you can select "Get My Products" to show all your shoppable products.
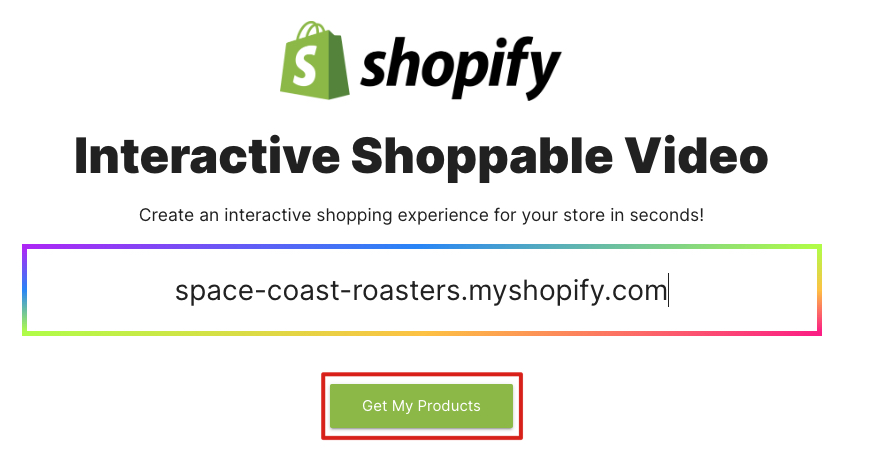
Getting Your Products
Once you see all of your products, select the ones you would like to showcase in your video. Once you have all the products you want to show, select "Make Video Shoppable."
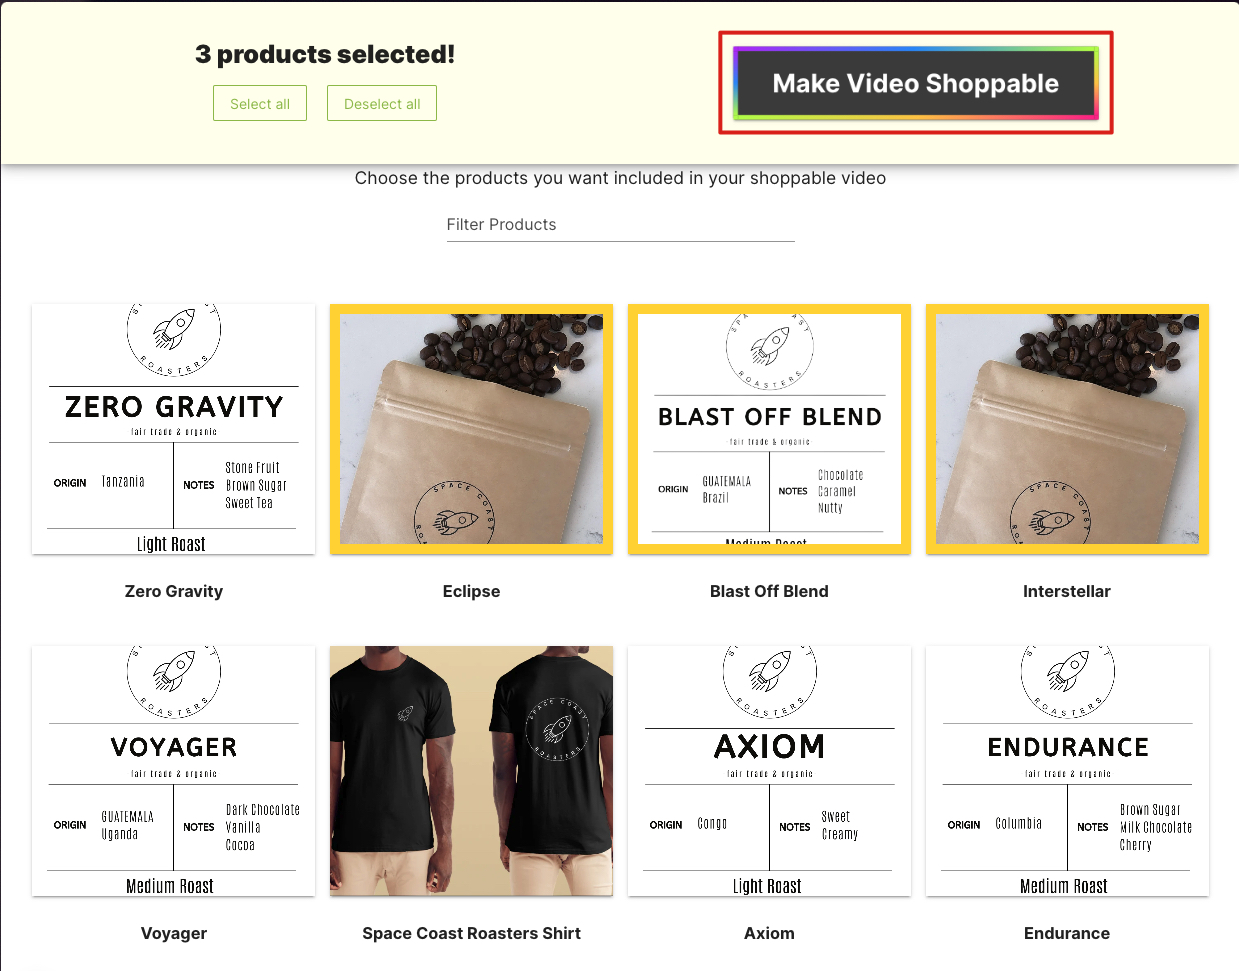
Make Video Shoppable
The first variant of the product will be selected when using this method of creating a shoppable video. To update this, you can follow the steps outlined above.
You will then be redirected to your video and will see each of the selected products showcased throughout your video.
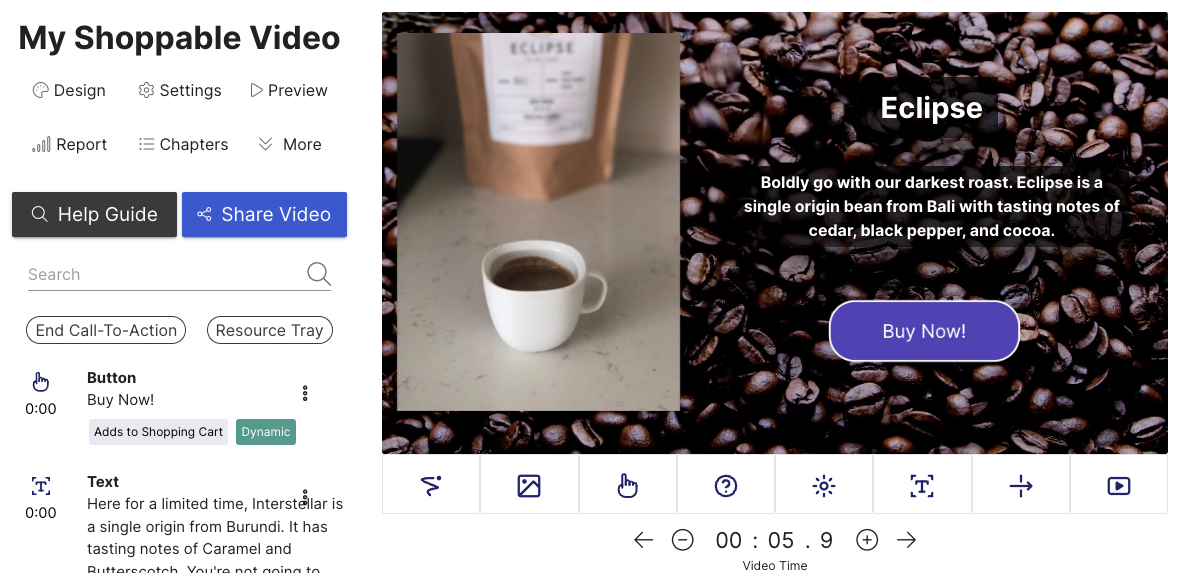
Completed Shoppable Video
Need help or want to know more about using Shopify with Mindstamp? We're here for you! Contact [email protected] to learn more