Using a Connector in your videos
Once you have created a Connector, you can begin to use it in your videos. Connector requests can be used for both click actions on Text, Buttons, Images, and Hotspots or via Navigations.
A high level, we need to do three things.
- Capture the user's phone number.
- Send a verification code to the viewer.
- Check that the verification code is correct.
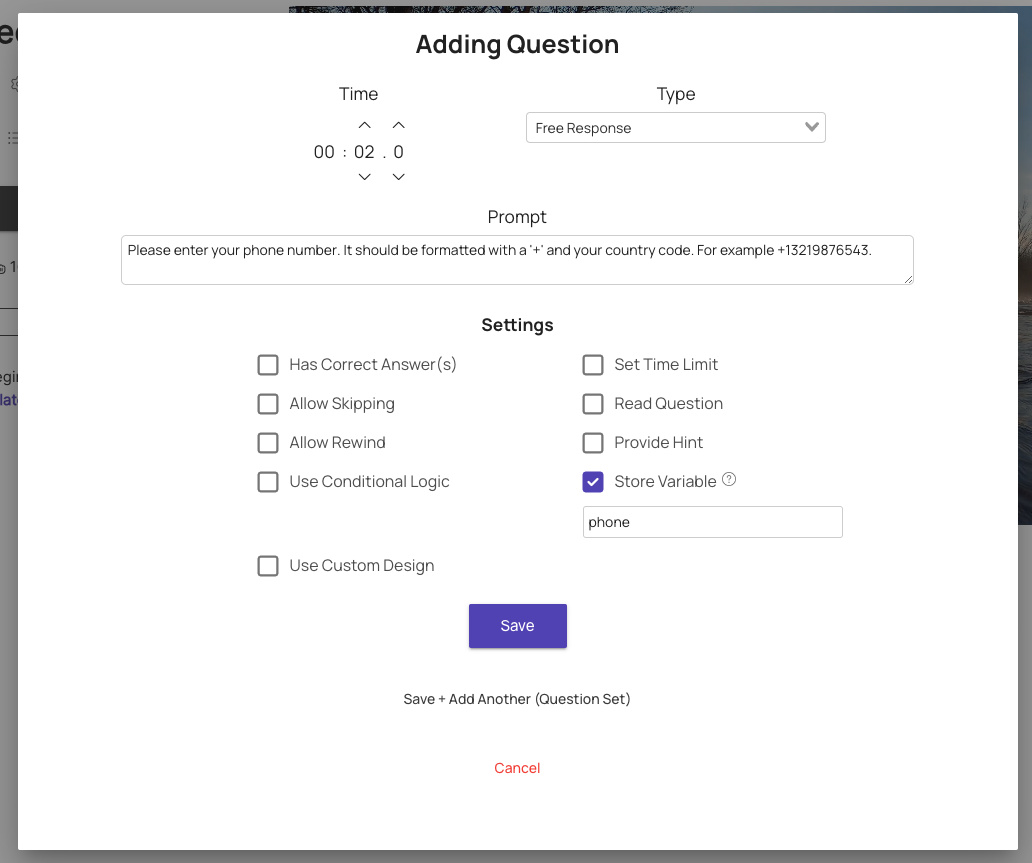
First, let's get the viewers phone. This can be done with Viewer Info Capture or a question interaction. Either will do, but I'm going to use a question.
Note
While the prompt can be whatever you like. It is important to store the result as a variable.
After the question is saved, we can now use a Connector request to send an SMS to our viewer. This can be done via a click action or a navigation. For this use example, we can use a navigation. First, select the time to be after the user phone number has been collected. Then, select the Connector (Post Request). From there, choose the connector (Twilio Send Verification for our case). All the other fields will fill out automatically and this navigation can be saved.
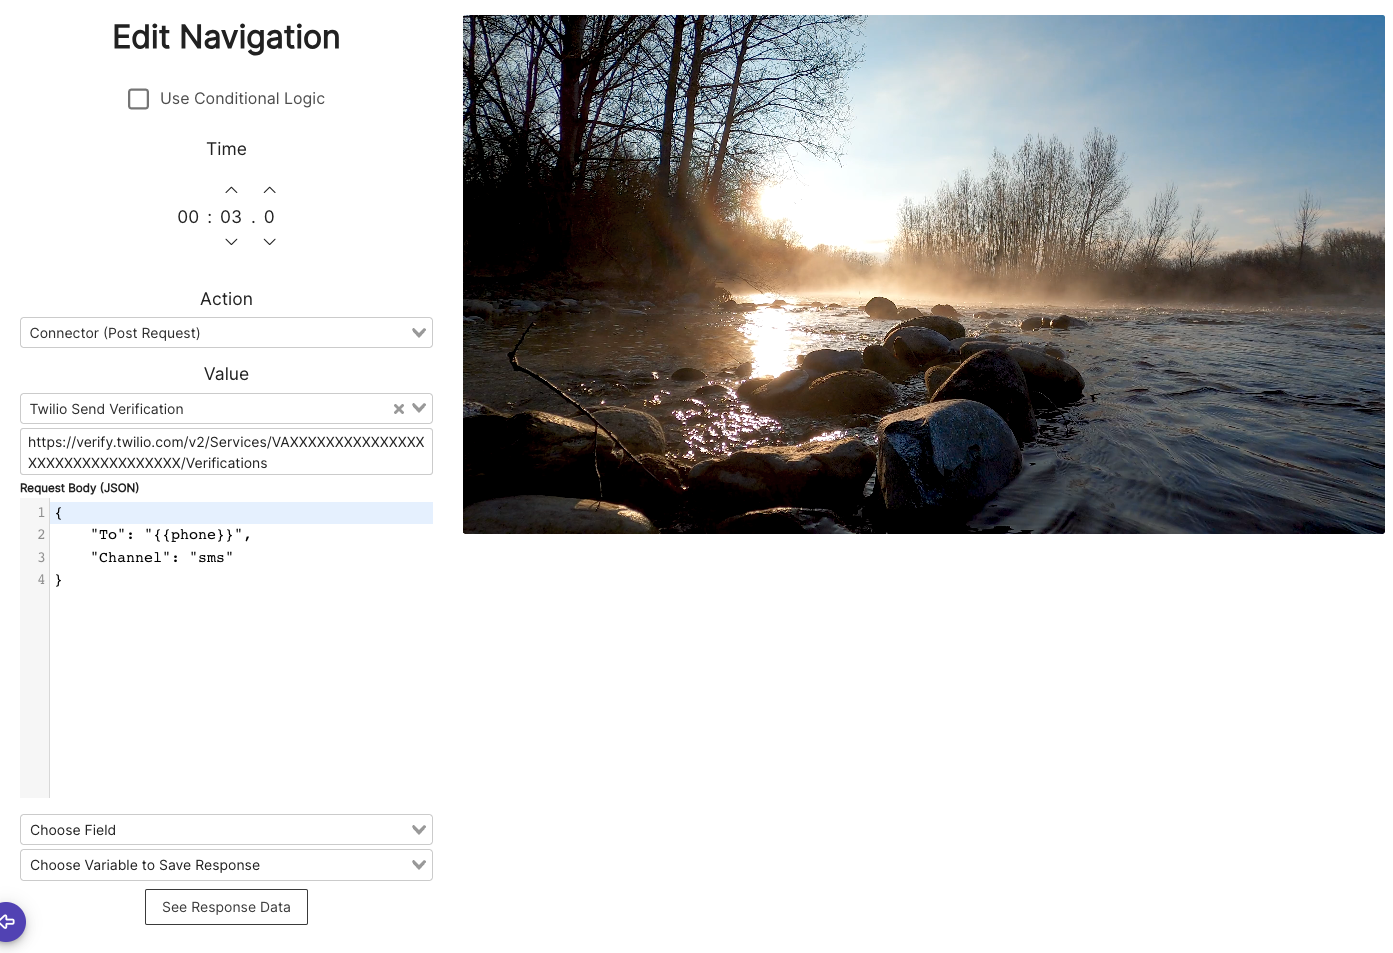
To recap, the viewer's phone number has been captured by the question interaction at 0:02 and we have sent a Connector request to Twilio to send an SMS to our viewer with the verification code.
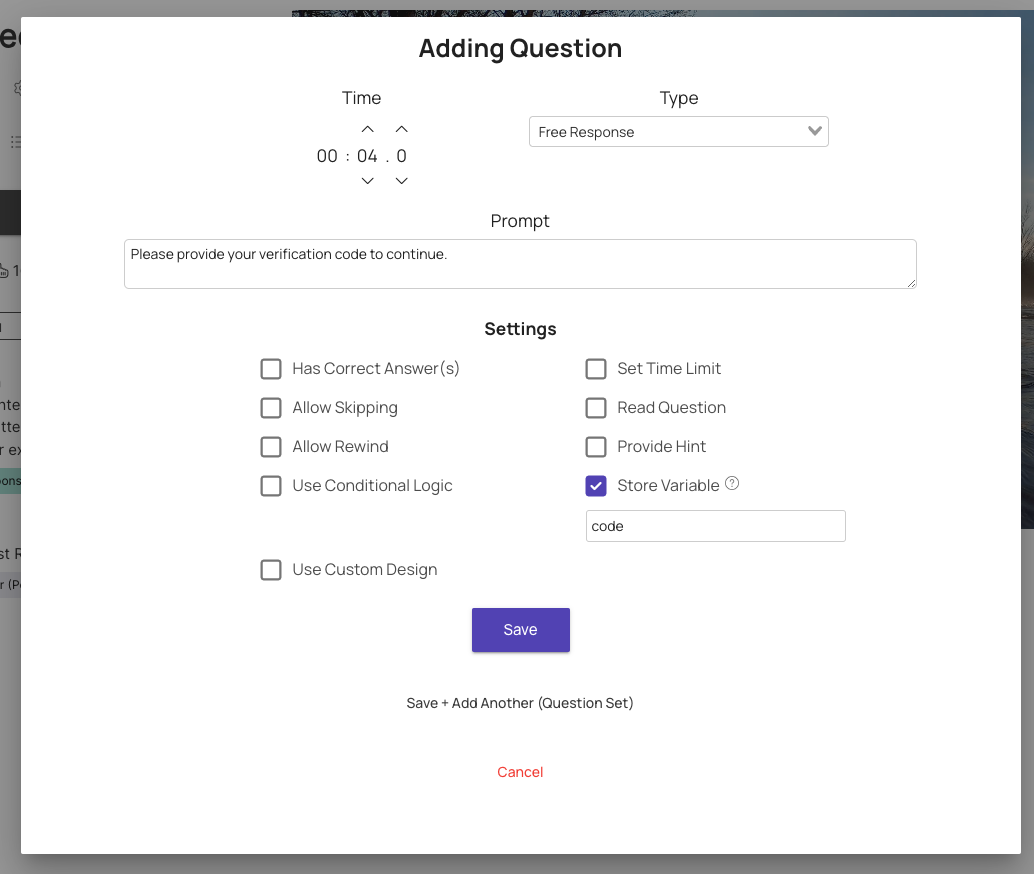
Next, we need the user to provide their verification code into the video. We can do this with another question interaction. Similar to the last question where we got the viewer's phone number, the prompt isn't as important as the variable we are storing the response. For the verification code, we want to store the viewer's response as code.
After saving this question, the last step here is to verify the user's code.
We can do this with another Connector action on a navigation using the Connector (Post Request) and the Twilio Check Verification Connector.
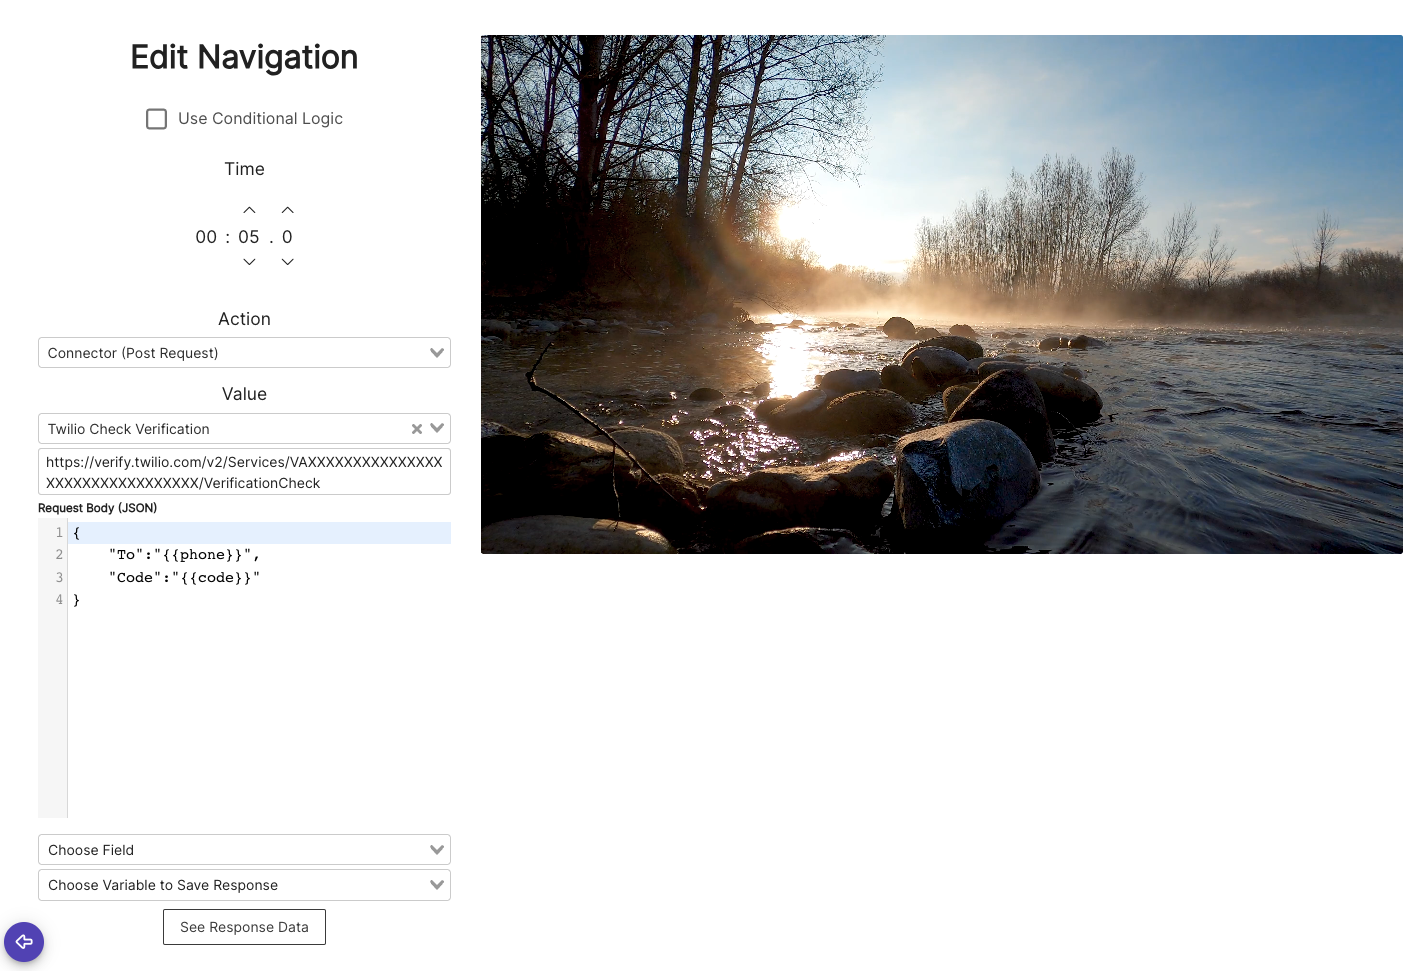
For this Connector request, we need to store data from the response. To do this, we can first substitute the variable values (i.e. phone and code) with real values. You can use your own phone number and the code that you received from the Twilio Send Verification Connector. Then, click See Response Data.
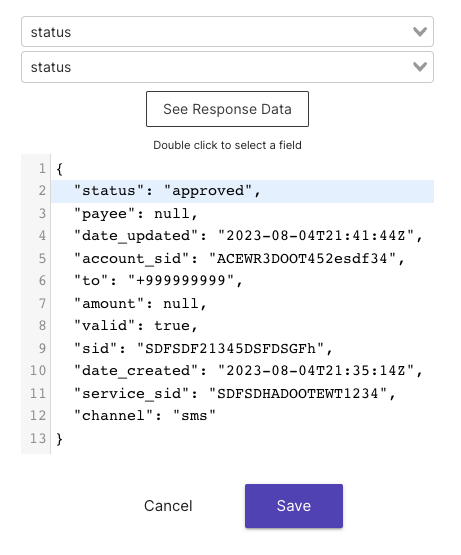
Upon doing so, you will see a response come in from Twilio. From here, we want to select the status as the Field and we can store the result to the status variable. If the status is approved then the verification is successful!
Before You Save
Make sure to revert the {{phone}} and {{code}} variables back in your Request Body.
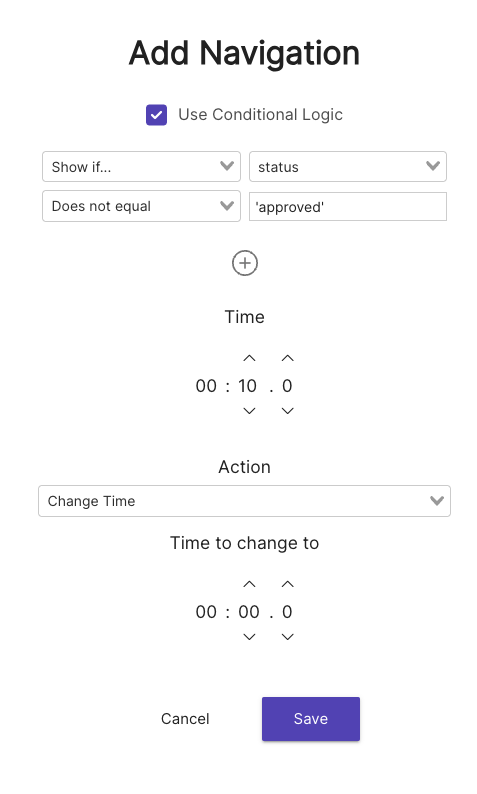
The last step for this verification process is to give your viewer another attempt at verification. To do this, set up another navigation after the Twillio Check Verification Connector to send the viewer back to the beginning if status is not approved.
Be Patient
Connector Requests can take a few seconds and depend on your viewers internet speed. Therefore, it is best to allow for a few seconds before checking the result of a Connector request. This is why in the above navigation, I have it 5 seconds after the Twilio Check Verification Connector.
That's it! You have successfully implemented text verification through Mindstamp with the power of Connectors! 💪🏼
Get in Touch
Need help or want to know more about Connectors on Mindstamp? We're here for you! Contact [email protected] to use Connectors in your videos or to learn more about what's possible.